


Robiola Cheese Making Recipe
-

Yield
1 Pound
-

Aging Time
~1 Month
-

Skill Level
Intermediate
-

Author
Jim Wallace


Robiola Cheese Making Recipe Info
Why Make Robiola?
Robiola History
Flavor & Aging
How to Make It
Ingredients
Total price for selected items: Total price:

Instructions
-

Acidify & Heat Milk
Begin by heating the milk to 72F* (21C). You do this by placing the milk in a pot or sink of very warm water. If you do this in a pot on the stove make sure you heat the milk slowly and stir it well as it heats
Once the milk is at 72F the culture can be added. To prevent the powder from caking and sinking in clumps, sprinkle the powder over the surface of the milk and then allow about 2 minutes for the powder to re-hydrate before stirring it in.
The milk now needs to sit covered and quiet for about 4 hours while the initial acid develops BEFORE adding the rennet. This longer ripening time will cause the rennet to work on the milk much quicker due to the higher acid.
*If using raw milk and especially goat, ewe, or a combo, the initial temperatures may need to be higher. The Murazzano ewes milk is heated as high as 98F (37C) but this is mostly because of the higher fat and difficulty in draining without a lot of stirring and heating post cut.
-

Coagulate with Rennet
Once the milk has developed acid you will add about 4 drops of single strength liquid rennet and stir for 1 minute.
The milk now needs to sit quietly for another 25-40 minutes while the culture continues its work and the rennet coagulates the curd. The thermal mass of this milk should keep it warm enough during this period. It is OK if the temp drops a few degrees during this time.
You will then find that the milk has thickened and may hold a good cut as shown at left but do not worry if it still seems very soft . Do not cut the curd yet. What you now want to see is whey rising from the curds, as shown on right. First, small drops, then little pools and even to a thin layer of whey over the curd. This may take another 8-24 hours depending on milk and room conditions. You can experiment on this timing to change your final curd texture and acid to make the cheese that you like the best.
When you see this whey rising, you can be sure that the curd has developed enough acid to be briefly cut and ladled to the forms.
-


Cut & Stir Curd
The curd is now ready to cut and release the first of the whey. Begin with making a larger 1.5" vertical cross cut with the knife, as in the photo below. Let this rest for 3-5 minutes to release some whey and become slightly firmer. The next cut will be done using the spoon or ladle and cross cutting to break the curds into bean sized pieces or a bit larger. Remember, the larger the cut the moister the final cheese.
Once the final cut is made, the curds can be stirred about 5-10 minutes to allow the curd pieces to firm up. Next you will let the curds settle while you prepare the sanitized molds and draining cloth.
You should now use a ladle or spoon to remove the whey down to the level of the curds.
-


Drain & Form Curd
The moist curds can now be transferred to a form lined with butter muslin. The molds should be set on a rack or platform above a basin, tray or sink to catch the whey as it drains. This whey will be too acid to use for ricotta but can be used for baking or cooking. Taste it at this point and you will note the acid.
The transfer should be done with a ladle without holes so that the curds are transferred with enough whey to float in the molds. This will allow a more compact cheese with fewer mechanical holes. It is fine to heap the curds over the tops of the mold because they will soon settle.
Once all of the curds have been transferred to the molds, neatly fold the cloth over the tops and turn the cheese in the form to encourage a nice even surface. You may even stack the molds for a little weight here, but this is optional.
In about 5-10 minutes the cheese will begin to form its nice compact surface. Turn the cheese in the basket and unfold the cloth.
-


Unmolding & Salting
The cheese is now firm enough to handle carefully. Lift the cheese from the cloth, turn onto the cloth in the basket and re-wrap. Allow this to drain for another 45-60 minutes.
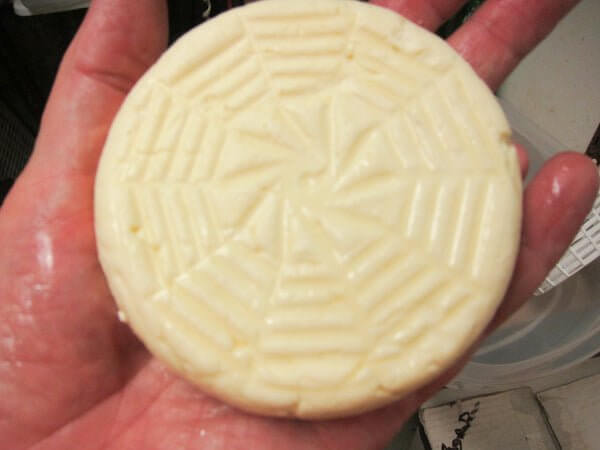
The cheese will be well firmed at the end of this draining period. The cloth can be removed and the cheese placed directly in the forms. These forms have a nice pattern and will imprint the cheese during the final draining.
This final draining will take about 12-18 hours. At the end of this, the cheese should be floated in a saturated brine for about 60 minutes. If the draining is too short then excess moisture will cause problems and if too long the acid of the cheese will be too high. This will be one of your controls to make the cheese you like best.
-

Drying & Aging
When the cheeses are removed from the brine they should be dried off in a cool room for about 4-6 hours. They can then go to the aging space at about 80-85% humidity and 52-58F for at least 4 days. They should be turned daily and wiped with a light brine if mold appears. At the end of this period they will be ready for the table as a very fresh cheese.
If you continue to wipe with brine every 2-5 days (as needed) to keep the mold growth down, the cheese may ripen for up to 30-40 days. It will change considerably in texture and flavor as the proteins continue to break down.
Cheese Making Supplies
Related Products
You May Also Like


