


Stilton Cheese Making Recipe
-

Yield
4 Pounds
-

Aging Time
~2 Months
-

Skill Level
Advanced
-

Author
Jim Wallace


Ingredients
Total price for selected items: Total price:

Instructions
This cheese was produced with raw unpasteurized milk from a local farm. Even though I could have waited for the natural flora to do it's work, a starter to develop acid was added along with an inoculation of p.rouqforti for the blue. This improves the chances of getting the proper cultures and making a more consistant cheese.
I suggest making this cheese with four gallons of milk or more. It is difficult to measure less culture. Larger recipes can be scaled up by increasing the ingredients proportionately.
This is a cheese requiring some experience with cheese making and might be a challenge to inexperienced cheese makers. I have included pH and TA% to follow the acid development if you have the tools available.
-

Heat & Acidify Milk
Rehydrate Penicillium Roquefort 2 hrs before heating milk.
Heat milk to 86F and add either 1/8 tsp of MM100 culture or 1/2 pack of C21 culture ~1/16 tsp Penicillium Roqueforti. For a more open texture, you can also add 1/16 tsp MD 88 Culture.
Let ripen for 30 minutes.
-


Coagulate with Rennet
Then add 2.25 ml of single strength calf rennet allow this to set for 1 hour to develop a good curd.
-


Drain Curd
After 1 hour check for a good curd and ladle curd to cloths in pan and let whey collect for 90 minutes, then drain pH=6.47 or TA% =.14
Let whey gather again for 30 min. pH=6.38 %TA=.16 then dump whey.
Allow curd to drain in bags for 2-4 hrs until %TA=.18-.2 pH=6.14, tighten cloths every hour.
When firm enough turn out curd and cut to 4” cubes turning every 15-30 minutes, until %TA=.4-.5 (5.5 pH)
-


Break up & Salt Curd
Break curds into walnut size or smaller pieces.
Apply 2.5% Salt by weight of curd to the blocks and allow to absorb this over the next hour. The yield here is about 5.75lb. therefore 2.3oz. of salt should be used. Add this in two batches allowing it to penetrate. Rest for 1 hour but stir the curds to keep from matting every 10-15 min.
-


Transfer Curd to Molds
Loosly pack curds into the molds (Weight is just enough to compensate for a full size stilton, about 5 lbs)
Turn several times in mold first hour then 2x@day for next few days.
After 3-5 days @ 70F remove mold and wrap in cloth for the next 5 days.
Then remove cloth and move to aging room 54-60F 85%RH
-


Aging
D+1 to D+4 turn in forms 2x@ day
D+5 wrap in cloth bandage
D+10 remove bandage. Weight loss since molding is about 30%
punch holes @ 5 weeks (1/8" needle and about 1 hole every 1" throughout top and bottom)
Ripe in 3-5 months
Detailed Overview of Aging
- Day 3-4 notice the blue mold is just beginning to develop.
- Between weeks 3-5 the cheese is still quite moist and giving off some very strong aromas.
- At 5 weeks the mold community on the outside should dry off a bit.
- At 3 weeks the blue is beginning to dry out and a multitude of different colored molds are forming on the outside. and then I will make multiple holes with a sterile needle to allow an exchange of gasses and the inner bluing should begin.
- The final step is to put it into my aging chamber to finish out the 4 month process
- At 8 weeks the cheese has been pierced to allow the internal development of the blue molds and the ammonia has subsided to a wonderful strong blue cheese aroma. The exterior has now formed a very definite crinkle and many of the molds have dried down to a good crust. The real secret here is to keep the humidity at a point where the surface doesn't crack nor become slimy at the other extreme. The only problem I can see at this point is waiting the next month or 2 until it reaches its peak
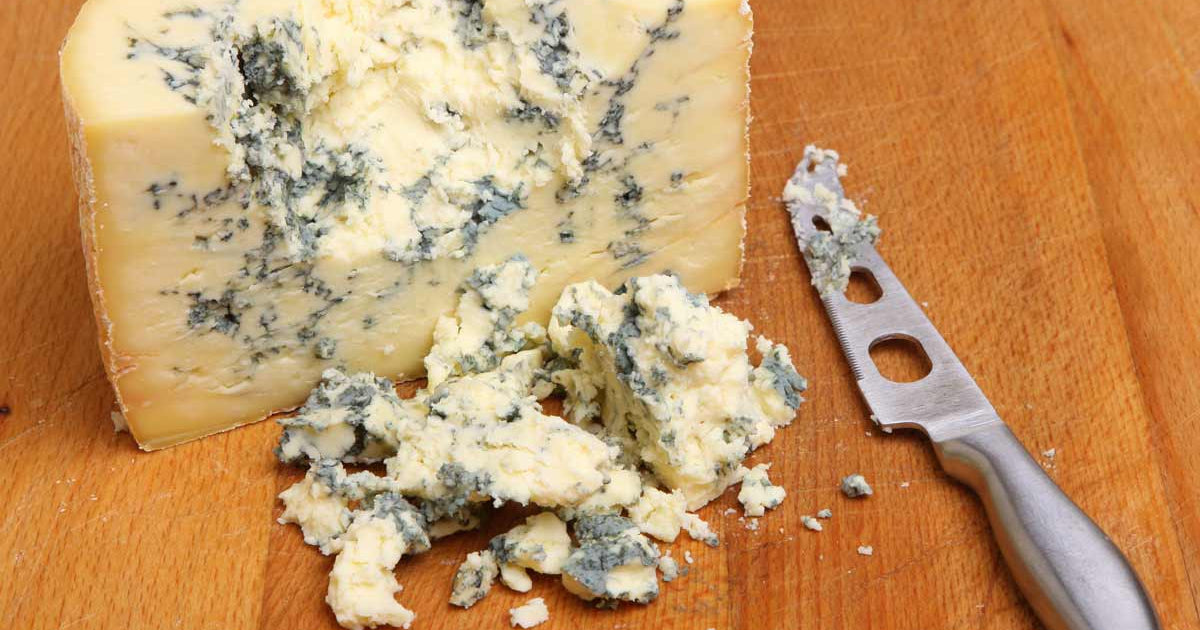
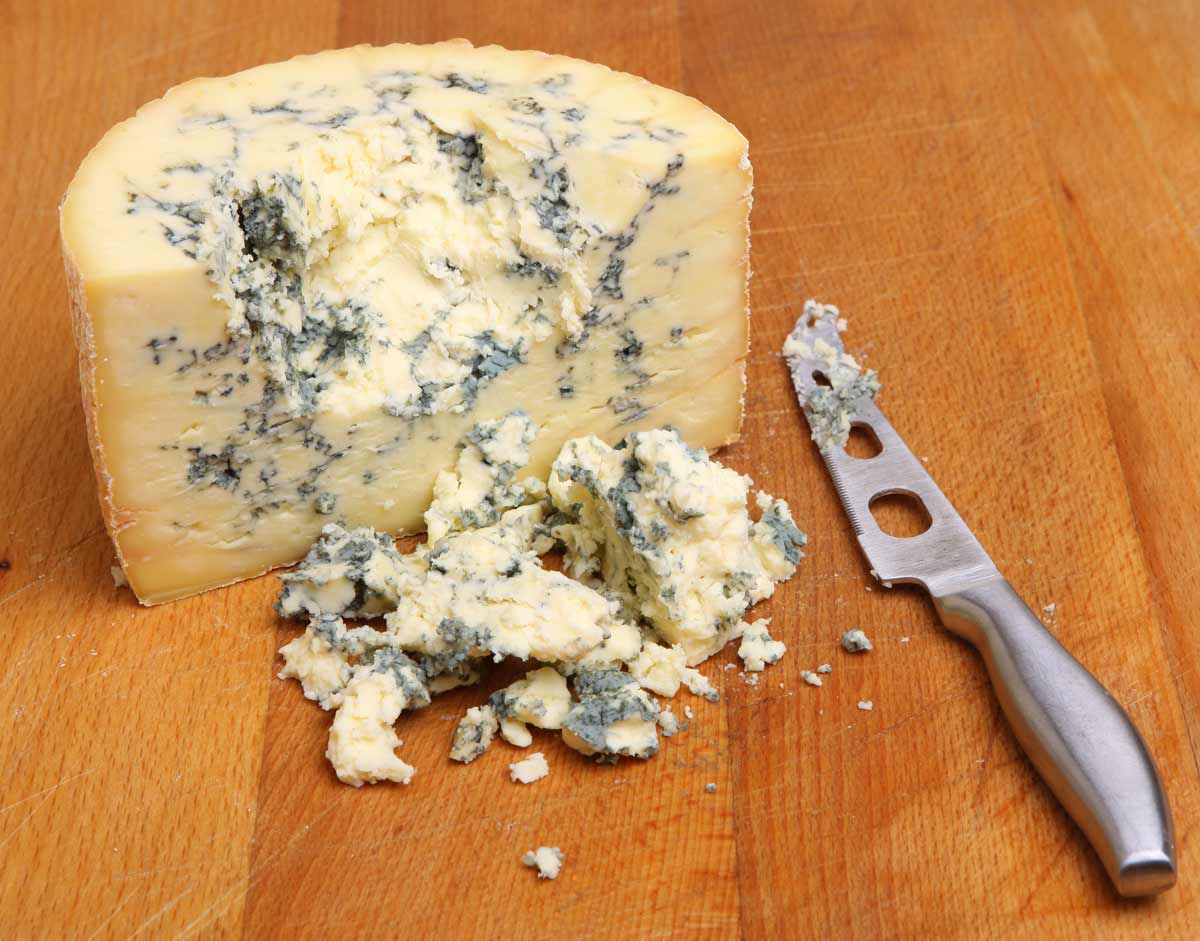
- At 12 weeks the cheese is ready to cut. The crust is a coat of many colors and the blue has done it's job inside. Notice the holes left by the earlier piercing to let air in and gasses out The flavor at this point is medium strong and permeates the entire cheese, The texture is very smooth, creamy, and spreadable but cuts cleanly and easily without crumbling. I will now be tasting this cheese over the next 4-8 weeks and expecting the flavor to get stronger.
Cheese Making Supplies
Related Products
You May Also Like


