


Lactic Cheese with Truffle Oil Recipe
-

Yield
1 Pound
-

Aging Time
None
-

Skill Level
Beginner
-

Author
Jim Wallace


Ingredients
Total price for selected items: Total price:

Instructions
-


Heat Milk, Add Culture & Rennet
Begin with a gallon of regular homogenized whole milk (about 3.25% fat) and add about 4-6 oz. of medium to heavy cream to make for a richer cheese. If using raw milk, most of it has a higher fat% than the store milk and can be used as is with no cream addition.
The culture addition is easiest done with one of our prepackaged cultures, which include just a tiny bit of powdered rennet already in the mix. But we also find for this cheese a little more rennet makes it set a bit firmer, so I advise adding another 2-4 drops of rennet in addition to what is already in the pack the packs. This will also help to trap the cream and keep it from rising so quickly.
If you have one of the larger culture packs, such as our Flora Danica or MM100, use about 1/16-1/8tsp depending on the milk. For this the rennet addition will be about 4-6 drops of single strength.
Begin by heating the milk to 68-72F (we used to call this room temperature). You do this by placing the milk in a pot or sink of very warm water and make sure you stir it well as it heats.
Once the milk is at the correct temperature the culture can be added. To prevent the powder from caking and sinking in clumps, sprinkle the powder over the surface of the milk and then allow about 2 minutes for the powder to re-hydrate before stirring it in. Once stirred in, the extra rennet can be added.
The milk, with culture and rennet, now needs to be kept at this target temperature for a long slow fermentation (18-24+ hours) to allow the culture to begin doing its work. It will be very slow steady rate of converting lactose to lactic acid because we are working at the lower end of the bacteria's activity range.
For most firmer pressed cheeses, with more rennet enzyme activity, there would be a lot more rennet added and the final curd would be formed in a matter of minutes, instead of many hours.
-

Let Milk Set
Once the milk is at temperature and the culture and rennet added, it now needs to sit quiet for 18-24+ hours while the culture works and the acid development brings the proteins into a firm curd.
It is important to keep the milk warm during this time, and since most of us are keeping our rooms a bit cooler these days, you will need to find a spot or method to keep the milk warmer. Our customers seem to find lots of ways to do this such as:
- Inside an insulated box with a jar or two of warm water
- In an oven with the light bulb left on
- Covered on top of the fridge where the cooling coils give some heat up
We will leave this part up to you, but do check the temperature for a steady temperature between 68-75 for it to work well. The warmer temps bring the curd to the desired firmness quicker. At 75F, you might expect 15-18 hours; at 68F it would be more like 24-28 hours. Cultures do not work well when the temperature is not stable or is below 68F
As the cultures work they will convert the lactose to lactic acid and develop a firm curd. You may observe this in several phases:
- Remains as warm milk
- Begins to develop a thicker texture but does not hold a knife cut. The curd will not taste very acid yet
- The curd firms and a few small spots of whey begin to form on the surface
- The whey on the surface begins to cover the surface. You will taste a bit more acid at this point
- The whey finally covers the curd to about a 1/4" and the curd may crack on its own and may pull away from the side of the pot. At this point the curd will taste quite tangy
You will need to wait until phase 5 to have a firm enough curd to ladle to the draining cloth, otherwise it will all break apart and even run through the cloth.
If you are using raw or non homogenized milk, the butterfat will tend to rise to the top during the resting period. You can gently stir this back down in a brief up and down motion with the ladle through phase 1 but no later. Once you observe phase 2, the cream is less likely to rise anyway.
-


CCut & Transfer Curd
Once you are confident the curd is firm, it can be cut vertically into 1" squares.
After cutting wait 5 minutes, then transfer the curds into a large colander lined with butter muslin.
Note: Ladling the curds directly into the colander without cutting them first also works, but I find cutting the curd first allows them to drain better.
-


Drain Curd
Let the curd drain in the cloth for 5-10 minutes at room temperature, then gather 3 corners together and, with the 4th corner, wrap it around the other 3 to form a secure draining bag. This is now ready to hang for better draining.
The cloth should be untied and the curd mixed at 30-60 minute intervals. Each time this is done the curds will be drier and more compact
The final moisture depends on what you want as a finished cheese:
- A very moist and spreadable cheese should be good in about 2-3 hrs of draining. This can then simply be moved to a container and chilled once the truffle oil and salt have been well blended in.
- My favorite is a longer draining and then packed into small forms for further draining resulting in a drier cheese that can be used in salads etc. (absolutely great in scrambled eggs with herbs).
-


Flavor & Form Cheese
Now that you have your lactic cheese base it's time for the artisan in you to emerge.
Flavoring the cheese is purely a matter of taste. A little salt will mellow the acid a bit, as well as help more whey to be released. The star quality though will be that exotic taste of Tartufa, or Truffle, oil (real truffle pieces if so inclined $$$).
Use a good quality cheese salt (not too fine nor too coarse) at a rate of about 1 tsp (start with 3/4 tsp and add more to your own taste). Too much salt will overpower the truffle and too little will show more acid.
Then use a good quality truffle oil. Make sure you smell and taste it to be sure it has not gone rancid on the store shelf or in the back of the fridge. I like the stuff so I use about 30 ml in this batch.
Make sure you blend the cheese well in a bowl to get it all mixed together. You can now either scoop it all into a nice serving container and refrigerate, or use a nice mold to shape the cheese, letting it dry down a bit more on the surface. The latter is my favorite and I allow it to sit in my aging space at 52F 80-85% moisture for about 5 days before un-molding and placing in a plastic container for the fridge. Size that container to about double the size of the cheese.
Whatever your plans for this, make sure you give it at least a few days for the flavors to work together. Who knows what they are doing in there but its usually a good thing!
-


Storage
This is a fresh, moist cheese and you probably wont see it around long enough for aging.
10-14 days would be surprising if it lasted that long (mostly because it tastes soo amazing).
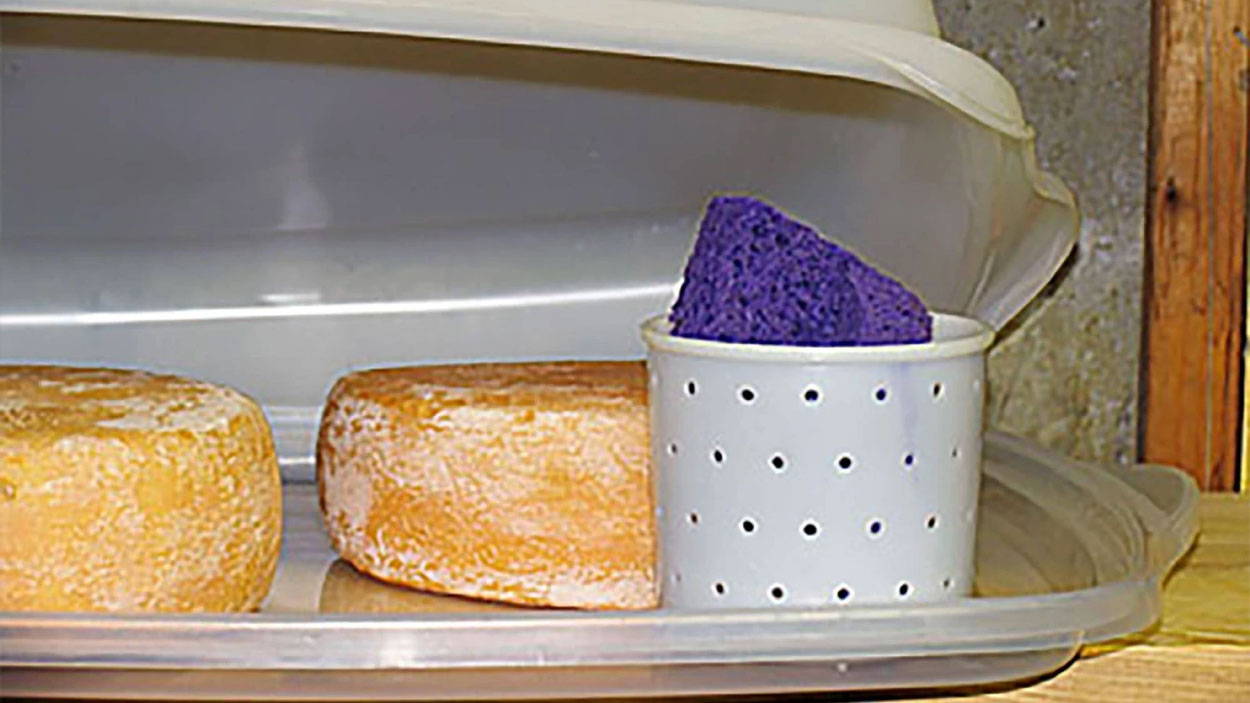
Store this one in a covered plastic container in the fridge. High moisture and cold fridge temp should stop any further bacteria activity and discourage the molds from forming.
Note in the picture above the slight condensation inside the container (a recycled tub flipped upside down). This is good to see although you don't want so much condensation that it begins dripping on the cheese.
Cheese Making Supplies
Popular Products
Cheese Making Recipes
Recommended Recipes
Learn how to make a cheese cave right at home. If you want your cheese to ripen properly you have to make them a good home and take care of them like little bambinos.