


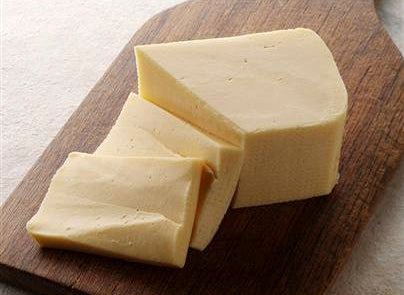
Butterkase Recipe
-

Yield
2 Pounds
-

Aging Time
~2 Months
-

Skill Level
Intermediate
-

Author
Jim Wallace


Butterkase Recipe Info
Overview
Name & Origins
Process
Texture & Flavor
Ingredients
Total price for selected items: Total price:

Instructions
-

Acidify & Heat Milk
Begin by heating the milk to 86°F (30°C). You do this by placing the milk in a pot or sink of very warm water. If you do this in a pot on the stove make sure you heat the milk slowly and stir it well as it heats.
Once the milk is at 86°F the two cultures can be added plus the geotrichum. To prevent the powder from caking and sinking in clumps sprinkle the powder over the surface of the milk and then allow about 2 minutes for the powder to re-hydrate before stirring it in.
Allow this to ripen for 45-60 minutes holding the temperature above. During this time both the Mesophilic and Thermophilic bacteria will begin to awaken but will be doing only minimal acid production.
Prepare the mold, cloth, and draining area by sanitizing everything while waiting for the culture to develop.
Next, begin heating the milk to 104F. As you heat from 86°F, any Mesophilic activity that has begun will slow down until it reaches 102-104°F, then they will begin to die off within about 15 minutes at the higher temperature. The enzymes left behind will be beneficial during aging.
Meanwhile, the Thermophilic will begin to move its more favorable temperature range and begin converting lactose to lactic acid.
-

Coagulate with Rennet
Then add about 2.25 ml or slightly less that 1/2 tsp of single strength liquid rennet.
The milk now needs to sit quiet for 20-25 minutes while the culture works and the rennet coagulates the curd . This is a very quick coagulation time due to the higher temperature and the milk will begin to thicken at about 8 minutes. The rennet needs to be added and mixed in thoroughly for 1 minute without agitating the milk excessively (up and down mixing is best). The milk needs to become still within 3 minutes of adding the rennet.
The high temperature will form a very firm curd and should have an almost tofu-like texture. Test the curd to be sure a good firm coagulation has taken place. The break should be very clean and the whey forming in the gap should be neither too milky nor too clear.
-


Cut Curds & Release Whey
The firm curd can now be cut. The first cut should be vertical only in both directions at about 2 inches. Rest the curd for about 5 minutes before the next cut. This will allow the cuts to heal and release minimal fat into the whey.
Next, make the horizontal cut with a spoon or draining ladle and continue breaking the curd to about 5/8 inch pieces over the next 7-10 minutes. Keep the curd moving gently during this time to avoid clumping.
-


Cook the Curds
Considering that the milk/curds were already heated to a higher temperature of 104-106°F, there is no need for further heating of the curds.
We do have a couple of options to vary the character of the final cheese at this point:
Option 1 - To produce a slightly more acid profile cheese: Let the curds rest for a short time (15-30 min.) to heal, release whey, and firm up. Only intermittent stirring (every 3-5 minutes) should be done just to keep curds free from matting.
Option 2 - To produces a sweeter cheese: This option involves a whey removal and replacement with the same temperature water. This will remove lactose and slow the acid development by reducing the lactose supply for the culture.
Do this by:
- Stirring the curds gently for 10 minutes
- Allow the curds to settle to the bottom
- Remove 50% of the whey
- Add the same amount of water back at 104-106°F
- Stir gently for 30 to 45 min
The final curds should be cooked well enough, so that when a small handful is compressed slightly, they do not become 'mooshy' (my new technical word for disintegrating, breaking down, etc.). In other words they may tend to deform but do not individually break up in your hand. This can be adjusted by the amount of final stirring times in both options above.
Our intent for this cheese is to produce a relatively moist curd going into the forms and allow it to continue developing acid while draining whey in a warm environment.
-


Form the Cheese
The final curds can now be transferred to the form (you should have already prepared and lined with butter muslin).
Begin by removing whey again down to about 1 inch above the curd surface.
Then transfer the curd along with the whey to your form, lightly compacting it as you fill.
Initially you may use a 4-6 lb. weight for about 1 hr. to consolidate the curd but do remember that an open internal paste is expected for this cheese.
At this point, your cheese is still converting lactose to lactic acid and MUST be kept warm at 80-90°F for the next 5-6 hrs while this acid production completes. The interior of the cheese may remain much warmer for several hours since it is cooling down from the original curd temperature of 104°F.
-


Form the Cheese (cont.)
I maintain the higher temperature during draining by using an insulated draining table with pans of hot water and an insulated cover over top.
You can do this at home simply by using an insulated cooler with jars or jugs of warm water to incubate the cheese. Remember to remove the whey that is released, as it accumulates.
The fresh Butterkase will need to be turned frequently at 30 minute intervals to close the surface openings during the first 3-4 hours. The cheese should be removed from the mold, unwrapped, turned, rewrapped, and put back into the mold at the above intervals to assure an even surface consolidation. At each turn you will notice the cheese has formed a smoother surface and rests lower in the mold.
At about 5-6 hours after molding the cheese, it should be ready to be un-molded, cooled overnight, and transferred to it's salt bath.
If the cheese still seems to be expelling whey, this is an indication that the cheese has cooled too much during the post molding and acid development has slowed. Allow it to sit a bit longer to develop its final acid and try to warm the developing cheese more next time.
-


Salting
You will need a saturated brine prepared for salting this cheese, find all of the details you need on brining here.
A simple brine formula is:
- 1 gallon of water
- 2.25 lbs of salt
- 1tbs. calcium chloride
- 1 tsp. white vinegar
- Bring the brine and cheese to 50-55°F before using
The cheese now needs to be soaked in the brine for about 3-4 hours.
The brining is done at a cool temperature of 52-56°F. Warmer conditions cause a faster salt intake and allow certain salt loving molds to grow. I always keep my brine in the cool cave between use.
The cheese will float above the brine surface so sprinkle another teaspoon or two of salt on the top surface of the cheese.
Flip the cheese and resalt the surface about half way through the brine period.
At the end of the brine bath, wipe the surface and allow the cheese to surface dry for a day . The surface may darken somewhat during this time but watch that no cracking occurs. I normally dry my cheese at about 52-56°F and a moisture of about 65-75%.
-

Aging
The cheese is now ready for aging.
The cheese should now be placed into your aging space at 52-56°F and 90-95% moisture. This is a higher amount of moisture than my cave normally operates at, so I use flat trays with covers, as pictured above, hold the higher moisture.
The ripening should be done for a minimum of 4-6 weeks but it can develop more character if held for longer.
The cheese should be turned at least once a day and during the first week it will develop a yeast community on the surface. The cheese will change from a rather dry surface to a greasy surface due to this. The surface community is actually decreasing the acidity because of the yeast and thus preparing it for a thin coat of geotrichum to grow. A small amount of a rosy-orange bacteria (natural B.linens) may also develop.
-


Aging (cont.)
This yeast (and eventually molds) should be controlled by periodically washing in a light brine (1 Tbs. noniodized salt in 1 cup of water) every 3-4 days. If the cheese surface tends to dry between these washing, wipe them as needed with a cloth moistend with unsalted potable water. In this case the moisture needs to be higher.
Then dry for 1-2 hours but never let the surface darken or become completely dry. Then return to a covered ripening tray to preserve the higher moisture in the cave. After about 10 days you will see a thin powdery white growth, this is from the geotrichum you added initially.
At about 3-4 weeks, the cheese can be washed for the last time. The earlier this is done, the milder the final cheese.
At about 4-6 weeks the cheese is ready for the table, but if a more complex cheese is desired with a softer structure, it can be wrapped and moved to a cooler 40-42°F aging space for extended aging. The moisture needs to be kept high enough to keep the surface from drying out.
Cheese Making Supplies
Related Products
You May Also Like


