


Danbo Cheese Making Recipe
Danbo can be anywhere from a fresh, sweet cheese with a creamy, buttery flavor to a much stronger and aromatic cheese, depending on how it is aged. Much of the sweet flavor comes from washing the curds early in the process, removing some of the whey. It also gains flavor and aroma from a specialized bacteria that is encouraged to grow on the surface of the cheese while it ages.
-

Yield
2 Pounds
-

Aging Time
~6 Months
-

Skill Level
Advanced
-

Author
Jim Wallace


Danbo Cheese Making Recipe Info
A Taste of Denmark
Danbo: Denmark’s Washed Rind Classic
Denmark’s Cheese Timeline
Ingredients
Total price for selected items: Total price:

Instructions
A Recipe for Making a Danbo
Danbo is a great cheese for the intermediate or advanced cheese maker. However, it's also a great recipe novice cheese makers to read and will hopefully inspire you to try some wonderful Danish cheese.
This recipe isn't difficult, but it does have a few steps that will be new to a beginner cheese maker.
In this recipe the curds get washed and it has a washed rind process to give a sweeter and moister cheese with a somewhat fragrantly pungent result.
As this is an intermediate to advanced guideline, I will provide a bit more background as we go on, to explain why we do what we do to make this such a wonderful cheese.
The pictures below are from a 4-4.5 gallon batch but the ingredients listed and directions are for a 2 gallon batch. You can easily double the ingredients for a larger cheese.
-

Acidify & Heat Milk
Begin by heating the milk to 90F . You do this by placing the milk in a pot or sink of very warm water. If you do this in a pot on the stove, make sure you heat the milk slowly and stir it well as it heats.
Once the milk is at 90F, the culture can be added. To prevent the powder from caking and sinking in clumps, sprinkle the powder over the surface of the milk and then allow about 2 minutes for the powder to re-hydrate before stirring it in.
The milk now needs to be kept at this target temperature until it is time to increase for cooking the curds. Hold the milk with culture quiet for the next 45 minutes to allow the culture to begin doing its work. It will be very slow initially, but will soon kick into its more rapid rate of converting lactose to lactic acid.
-

Coagulate with Rennet
Add about 2.5ml (1/2 tsp) of single strength liquid rennet.
This needs to be stirred in a slow up and down motion for about 1-2 minutes. Avoid agitating the milk. Culture does not like a lot of air mixed into the milk.
The milk now needs to sit quiet for 45 minutes, while the culture works and the rennet coagulates the curd . The thermal mass of this milk should keep it warm during this period. It is OK if the temp drops a few degrees during this time. You should notice the milk beginning to thicken at about 15 minutes, showing a much higher surface tension than the milk. Let this go until a firm curd is established, about 45 min. from the rennet addition.
While you are waiting, begin heating another pot of water (about 30-50% of your milk volume) to about 160F. This will be used later for the washing of the curds and cooking phase. It can also be used to sanitize your molds and draining cloth as well.
Also, the mold and draining cloths should be cleaned and sanitized and placed in a good space so that whey can run off while molding and pressing the cheese later.
-


Cut Curd & Release Whey
When the curd tests good for firmness (it splits well when raised with the flat blade of a knife), then it is ready to cut. Leave it a bit longer if the curd does not seem firm enough.
Make the first cut as shown in the photo above on the right. Cut about 1" apart vertical only and again at right angle. Then allow this to rest for 3-5 min. until the whey rises and shows in the cuts.
Next, the final cut can be done with a flat ladle or knife at an angle to finish with curds slightly larger than 1/4" (they will become smaller when cooked and stirred). Then allow this to rest for about 5 mins while the cut heals and the curd firms slightly.
The curds then need to be stirred GENTLY for the next 15 minutes, while the surfaces heal and harden slightly. The temperature should be kept steady at 90F. Then stop stirring and let the curds settle under the whey.
-


Wash & Cook Curd
This may be something new to many. By washing the curds, the final cheese is made sweeter because we first remove a substantial amount of whey which contains the lactose.
Lactose = food for bacteria, less food means less acid is produced and thus the cheese will be sweeter.
Also, less acid changes the texture to a more supple and elastic character in the final cheese (more calcium is retained). Timing is important here to avoid excess acid production while lactose is still present with the curds.
As soon as the curds have been firmed up from the last step, begin to remove about 30-40% of the whey (the more removed the less acid is produced and the sweeter the cheese). This is still a sweet whey and can be used for ricotta if not left too long. Be careful to avoid gathering the curds with the whey.
You now should have a pot of curds with the whey just covering them.
The next step should begin quickly to avoid too much acid production. You will now begin to add the hot water (~130-135F) to the curds slowly, with slow gentle stirring over the next 30 minutes. You will keep adding until the pot is back to its original milk volume of 2 gallons. Your final temperature should be 102F at the end of 30 min. If you are not at this temperature, then heat the curds and whey while stirring until it is at this final temperature.
At this point, the curds have firmed up substantially but still need another 20-30 minutes of stirring while maintaining the 102F temperature.
The final curds should be cooked well through and should be examined to make sure that enough moisture has been removed. A broken curd should be firm throughout and the curds should have a moderate resistance when pressed between the fingers.
When this point is reached the curds can be allowed to settle under the whey.
-


Form the Curds
The whey can then be removed down to about 1-2 inches above the level of the curds. This whey has been diluted and is now more acid so will not be great for ricotta (the result would not be a sweet ricotta and the yield would be low).
Now we throw another twist into the works here. Instead of moving the dry curds direct to the mold, place the mold lined with cloth into the second pot, sized a little wider and higher than the mold to be used. This will allow us to transfer all of the curd and whey so that the curds are floating under whey in the form.
This step will cause the curds to consolidate to form a nice tight cheese body with few mechanical holes and with much less press weight. They will be pressed lightly under the whey in the first phase of pressing. As the curds are slowly pressed in the next stage they will squeeze out both air and whey in all of the small openings that were originally there.
The final curds in form should be totally covered in whey after the cloth tails are laid over the surface. The curd is now ready to be pressed.
-


Pressing
Part 1
This will be done with whey covering the curds in their form. Place the follower over the curds and begin with about 4 lbs of weight. This can be as simple as 2 quarts of warm water or anything weighing about 4lbs A wide format weight avoids the frustration of trying to balance a tall can of something on the top it all. This should be done for about 15 minutes.
Part 2
Next, the weight is removed and the form is moved to your press area so that the residual whey can drain off.
Leave in the press for 3 hrs, removing and turning at 30 minute intervals, using the following schedule:
- Begin with 15 lbs for 30 minutes
- Increase this to 20 lbs for another 30 minutes
- Then 25 lbs for 1 hour
- Finally 25 lbs again for 1 more hour.
Note the slow and light weight press schedule above
The rate of whey running off is simply a matter of drops and not a stream of whey being released. This is a good rate of whey removal during pressing and will slow even more as the residual free moisture is released. The form should show tears of whey weeping from the form very slowly. When this stops you can increase the weight slightly.
The cheese should be removed from the press, unwrapped, turned, rewrapped, and put back to the press at the above intervals to assure an even consolidation.
Following the above press schedule, leave the cheese in a warm place (80+F) for 5-6 hrs to develop more acidity.
Finally, place the cheese with its mold (helps to keep its soft shape) into a pan of cold 50F water and place in a cool area to slow acid development overnight. Acidify the water with about 1/2 -3/4 tsp white vinegar plus add 1/2 tsp CaCl. This should approximate the condition of the cheese so there will not be any softening of the cheese surface.
The cold temperature will also help slow the bacteria activity even more.
As you can see, the character of the cheese is brought about by altering the normal acid development profile. It begins with normal acid development, but is soon slowed by first removing some whey and finally by chilling the cheese overnight. In addition, the overnight water bath will tend to rehydrate the young cheese surface.
All of these phases will be involved in developing the final texture and character of this cheese.
The next morning the young Danbo will have reached its final acidity and be ready for a brine bath
-


Salting
You will need a saturated brine prepared for salting this cheese, find all of the details you need on brining here.
A simple brine formula is:
- 1 gallon of water
- 2.25 lbs of salt
- 1 Tbs calcium chloride
- 1 tsp white vinegar
- Bring the brine and cheese to 50-55¡F before using.
Brine at about 2 hrs per lb. of cheese The cheese will float above the brine surface so sprinkle another teaspoon or 2 of salt on the top surface of the cheese. Flip the cheese and re-salt the surface about half way through the brine period.
At the end of the brine bath, wipe the surface and allow the cheese to surface dry in a cool, medium moisture area until any surface moisture disappears. Do not let the surface crack or darken during this period. A too dry surface will slow the final surface development of the washed rind.
While the cheese is brining, make up the surface smear culture to be used the next day:
- 1 cup Cool Water
- 1 Tbsp Salt
- 1/64 tsp B. Linens
- 1/64 tsp Sugar
Once made, hold this mixture at 55-60F
-


Washing the Rind
The next step for this cheese is to protect the surface and develop the typical flavor and texture by developing a washed rind.
This washed rind surface will:
- Keep the cheese hydrated
- Protect the surface from unwanted molds
- Contribute a very distinctive flavor
The aging of this cheese follows the process for the washed rind cheese surface for a short to medium period of time and then is washed away. The specific time will be determined by whether you want a mild or stronger flavor. This will give the cheese a warm nutty flavor. You may see this referred to as a washed rind or smear ripened cheese depending on the surface moisture control of the cheese.
The cheese should be placed into your aging space at 52-56F and 87-92% moisture. Rest the cheese on a mat that allows a little air flow underneath. A covered plastic container will keep the higher moisture.
For the washed rind, your objective is a cheese surface that is neither wet nor dry. It should feel a bit damp and perhaps even a little tacky. Swampy is not what we want here. Make sure you turn the cheese daily.
At about day 2-4, you should notice a definite slippery, or greasy, nature to your rind. This is a complex blend of natural yeast populating the surface and you should notice a definite yeasty or fruity smell to it.
Then, at about day 4-6 days from making, you should notice a slight dusting of white mold beginning to form (you may really need to look at the surface to see it). This is the yeast plus a natural geotrichum community (they are everywhere) developing (pic at the right here).
Within a few days more, you may see the first of other unwanted molds shown below. This is where you begin the salt wash for controlling unwanted molds.
When you see the greasy surface and white mold first forming, begin to wash the surface:
- Dampen a clean, sanitized cloth with the brine you were advised to make earlier and wipe only the top surface and sides. This will spread the growing molds around, moisten the cheese surface with your light brine to provide the salt which will discourage unwanted molds (blues, mucor, etc).
- Return the cheese to the aging space keeping the washed side up. If the surface seems a bit dry, improve the moisture 87-92% in your aging space or, if too wet, reduce it. I use a covered plastic box for this higher moisture.
- The next day, turn the cheese and repeat the same process as bove with the new unwashed surface. Allow the cheese to rest again with only daily turnings.
- You should see the white mold coming again in 2-3 days.
- Repeat steps 1-3 every 2 days through day 14, then 2 times a week or as needed.
-


Aging
At about 2 weeks, you will begin to notice a slight rosy to orange color on the surface. This is a sign that the process is going well.
The complex bacteria/mold surface will not only keep other unwanted molds at bay, but will provide a rather aromatic (in a good way) quality that enhances the cheese.
At this point, the washing only needs to be done again when an unwanted mold appears. Do not allow this rind to become too moist (excessively sticky or swampy) or too dry. If too dry you may find that the surface may crack, scale, or even begin to exfoliate or lift.
The cheese can now be aged for 3-6 months and it will be ready for your table (age longer for a stronger cheese).
The amount of washing of the rind, the temperature, moisture control, and the amount of aging time will determine how much character the cheese develops.
If you would like a mild cheese, keep the aging short and be more aggressive at washing the developing rind away when washing. Try to keep the rind thin.
If you want your cheese to have a lot of character, then longer aging and developing a good healthy rind are the way to go.
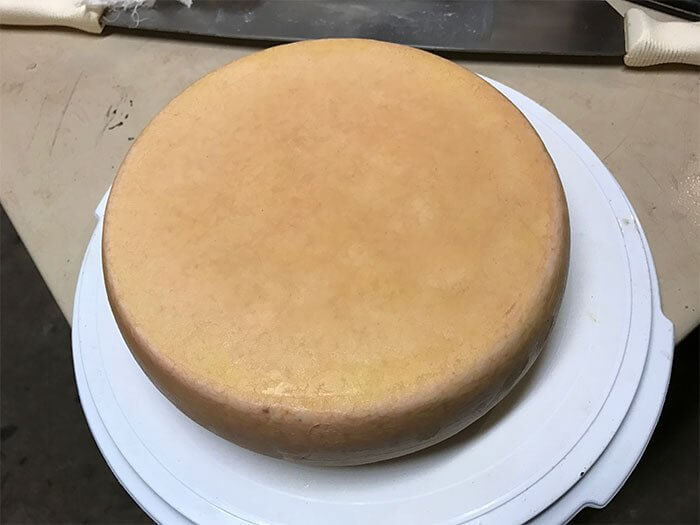
Below are a couple of pictures of the cheese at about 6 weeks with a nice surface developed. At this point I only wipe it with a cool water dampened cloth. I will let it continue aging for as long as I can stand to wait for it now .. maybe late June early July. By then I should have plenty of other cheeses aging in the cave.
Cheese Making Supplies
Related Products
You May Also Like


