


Lactic Cheese Making Recipe
-

Aging Time
~1 Month
-

Skill Level
Beginner
-

Author
Jim Wallace


Ingredients
Total price for selected items: Total price:

Instructions
-


Heat Milk
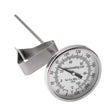
Begin by heating the milk to 86F (30C). You do this by placing the milk in a pot or sink of very warm water. If you do this in a pot on the stove make sure you heat the milk slowly and stir it well as it heats.
Some folks like to do this at room temperature but we prefer to raise the milk to 86F first because this is the temperature that the bacteria does best. Traditionally this was also the temperature of the milk shortly after it came from milking.
-

Add Culture
Add the culture to the milk, let re-hydrate for 2 minutes, then mix culture into milk.
If using the Chevre culture, there is no need to add rennet, since we have already added the proper amount of powdered rennet to the culture pack.
If using Buttermilk culture you will need to add about 2 drops of rennet to a gallon of milk.
The milk now needs to sit quiet for about 16-24 hours while the culture works and the acidity coagulates the curd. The thermal mass of this milk should keep it warm during this period. It is normal if the temperature drops to room temperature during this time but do keep it between 68-72F otherwise acid development and coagulation may slow down.
Note: Even if no rennet was used, the milk would still coagulate, but it would take several hours longer. This small amount of rennet speeds up the process and allows cheese makers to maintain a 24 hour cycle of coagulating, draining and molding.
-


Thickened Curd
The primary indication for proper curd development is the observation of clear whey beginning to rise.
The first indication will be small droplets of whey forming on the surface, next you will see small puddles forming as the whey rises, and finally you will see a thin layer of whey over the entire curd mass. You may even note the curd pulling away from the vat edges or forming cracks. It is now ready to cut. Note the photos above.
If your curd does not seem to be set within this time frame, you should let it continue to sit quietly. This may take as much as 36-48 hours for some milks and during some seasons.
Smell & Taste the milk again and note the pronounced acid character. Using your senses here will aid in becoming a better cheese maker.
Note: If using non-homogenized or raw milk, there will be a tendency for the cream to rise excessively. To avoid this you can wait 6-8 hours before adding the rennet while the milk develops acidity. Be careful to add the rennet before the milk begins to thicken. In doing this, the cream will not have time to rise before the milk begins to set. If the milk begins to thicken before adding the rennet, do not add the rennet at all. The milk will take longer to coagulate but will set fine without the rennet.
-


Transfering Raw Milk Curds
If using a very fresh farm milk or a milk that we know forms a good curd (pasteurized at normal time/temperature and below 172F) we can simply ladle the curds directly to the forms for draining
-


Transfering Pasteurized Milk Curds
if we are using a high temperature pasteurization there will be a tendency for a weak curd and is essential to drain the curds with the butter muslin. The reason for this is that the weak curd structure does not drain well and needs assistance of a mechanical nature.
The curds are carefully ladled into the butter muslin lined colander or draining pan. Then the 4 corners are brought together and the cloth bound curd is hung to drain. The weight of the curd will provide some incentive for draining and the cloth can be opened and the curd gently turned during the draining to make a drier curd. This will take from 18 to 24 hours and longer.
The whey draining from your bag of curds will be very clear and after the finished draining, the curd should seem quite dry and ready for molding.
The curd is now ready to be transfered into cheese mold.
-

Draining in Molds
The curd now needs to drain and consolidate in the forms for another 24 hours before turning and salting.
Once the cheese has drained and settled in the molds, the salt can be added.
To do this:
- Turn the cheese in the mold (moister side will be up).
- Use a medium grain salt (non-iodized) since a fine grain will dissolve too fast.
- For cheese using the molds mentioned above, use about 1/4 tsp for the surface of each cheese.
- Sprinkle evenly over the surface and wait about 2-4 hours for salt absorbtion.
- Then turn the cheese and repeat, waiting another 2-4 hrs for the salt to be absorbed.
-


Drying & Finishing
The cheese can now be taken from the molds and dried off for another day.
Note the fan in the photo below which is set on low to provide enough air movement to further dry off the surfaces.
This is also a good time to add any special surface treatments:
- An herb mix using fresh herbs from the garden chopped fine and sprinkled evenly over the surface. Or dried herbs from the store will add another flavor dimension. I normally do not recommend using fresh herbs but since these are for a fresh cheese eaten within a few days, good clean fresh herbs that have been washed and dried should be fine.
- Any mix of seeds, berries, chopped chiles, paprika, cocoa, coffee etc. will be fine. Your imagination and taste are your only limitations.
- Ash can be mixed with the salt to dry out the surface more and allow natural surface molds to develop.
- The surface can be left as is to allow natural molds to develop such as the geotrichum in the photo below.
-


Aging
Final aging can be anything from a day or two, to several weeks. As the cheese ages the surface will dry down and the paste will become somewhat drier/denser and if the proper molds develop may begin to soften as it ripens near the surface.
The final cheese, ready to eat, Hopefully we have left you with the inspiration to make this for your family and friends, Yum.
Cheese Making Supplies
Related Products
You May Also Like


