


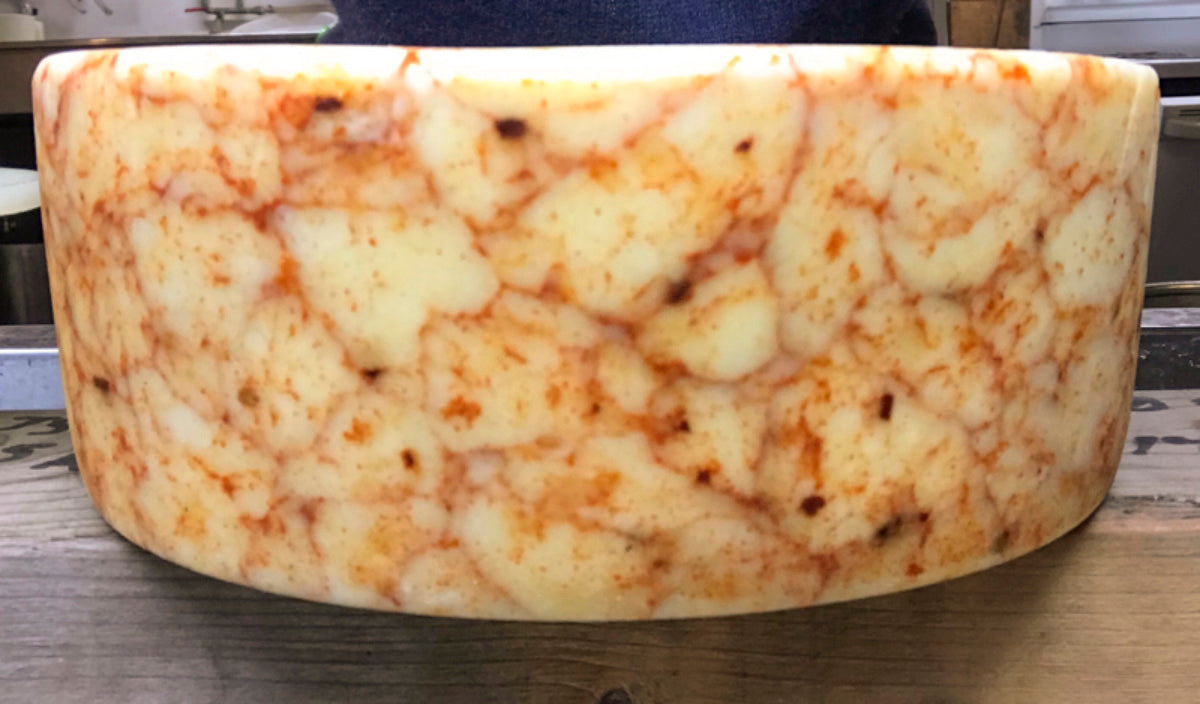
Cheddar Warp with a Kick Cheese Making Recipe
-

Yield
4 Pounds
-

Aging Time
~3 Months
-

Skill Level
Intermediate
-

Author
Jim Wallace


Ingredients
Total price for selected items: Total price:

Instructions
With an added complexity of split culture/temperature this is a wonderful and engaging recipe for intermediate cheese makers.
Although curds are formed into a large block, like cheddar, torn into smaller curds, salted and pressed back into the final cheese, the added complexity of cultures result is a texture that is totally unlike any cheddar. With this cheese, cultures are added in two phases and a longer ripening time is used:
Mesophilic culture combo | MD 88 has both acid producing and flavor/gas producing abilities to develop a unique flavor and texture. This culture utilizes a lower temperature and longer ripping time, before moving to a higher temperature and adding the thermophilic culture.
Thermophilic culture | TA 61 is added after at a higher temperature, after the mesophilic culture has ripening for two hours. This thermophilic culture will produce some acid but the real benefit will are the enzymes that work while the cheese is aging.
The final curds, before pressing, will be firm but slightly moister than a cheddar. This higher moisture causes an earlier aging, However the Thermophilic culture addition also provides a stabilizing character and tends to lend a longer period of consumption.
-
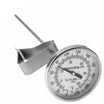
Heat & Acidify Milk
Slowly heat milk to 84-86F, occasionally stir milk while heating.
Once heated, add Mesophilic culture (MD 88) and, if milk is pasteurized, also add Meophilic culture (MA 11). Sprinkle culture over the surface of the milk and let re-hydrate two minutes before stirring it in.
Let milk ripen for two hours. This is longer than normal because we have used a small amount of culture and are focusing on the MD 88 culture and less on acid production.
This lower temperature ripening period here is to encourage the open structure and buttery flavor.
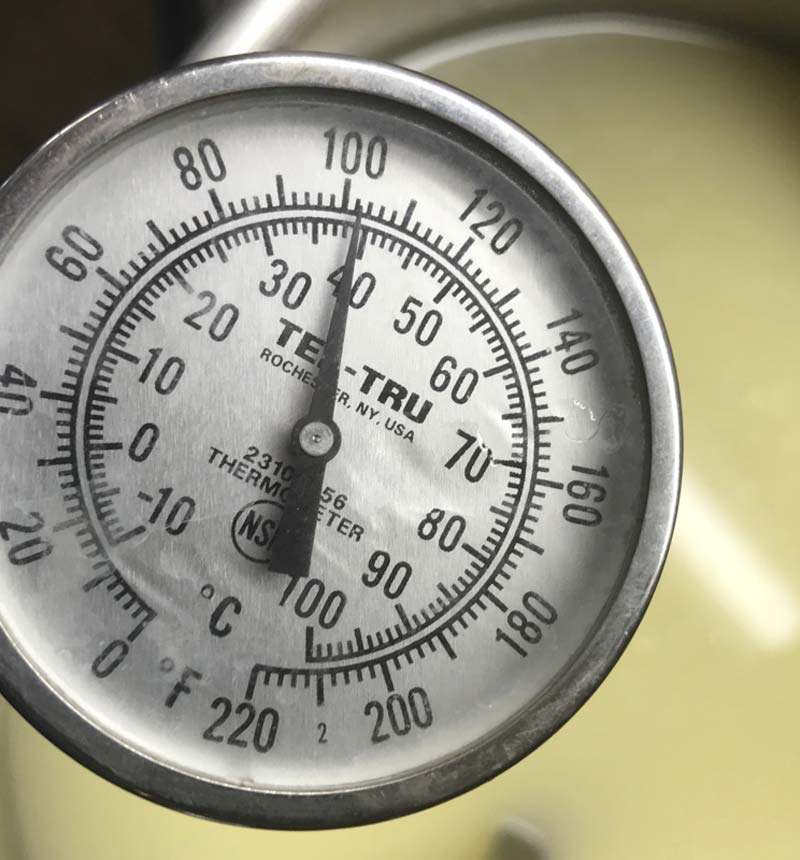
After culturing for two hours, Heat milk to 92F, then add Thermophilic culture (TA 61). Slowly heat milk to 102F, over the next 15 minutes, while gently stirring. Once heated, allow milk to rest for an additional 20-25 minutes. This is just long enough to awaken the thermophilic culture. This culture will continue ripening through the rennet coagulation and stirring phase.
-


Coagulate with Rennet
Add single strength liquid rennet and let the milk sit quietly for 24 minutes.
The milk will begin to thicken after 8 minutes, but allow it to coagulate to proper firmness at about 24 minutes.
When done, it is always best to check for a firm coagulation. If needed, allow it to set as much as 50% longer. The next time you make cheese, adjust the rennet amount, more rennet for a quicker set less for longer.
The curd should show and hold a clean cut with whey rising in the test cut that is not too cloudy.
Note: The thermal mass of the milk should keep it warm during this period. It is ok if the temperature drops a few degrees, you can heat it back to temperature after cutting, in the next step.
-

Cut Curd
Once the milk has set well the curds can be cut, this is the first step in reducing curd moisture.
Cut the curd mass as evenly as possible into 3/8” pieces. Allow the cut curd to rest for 5 minutes, so the cut surfaces can heal. After 5 minutes, slowly stir curds for 10 minutes to firm up the curd surfaces.
Both the rest and stir are important to prepare for the cooking phase that comes next. Without it, the curds would break further and loose too much moisture.
-


Cook Curds
Maintain 102F temperature and slowly stir the curds for another 45-60 minutes. This time may need to be extended if curds are still soft.
When done, examine curds to make sure enough moisture has been removed.
The final curds should be cooked well through. When broken a curd should be firm throughout and have a moderate resistance when pressed between the fingers. The final curds at this point should also taste quite sweet since only a small amount of lactose has been converted. A small piece of curd should show a mild resistance to the bite.
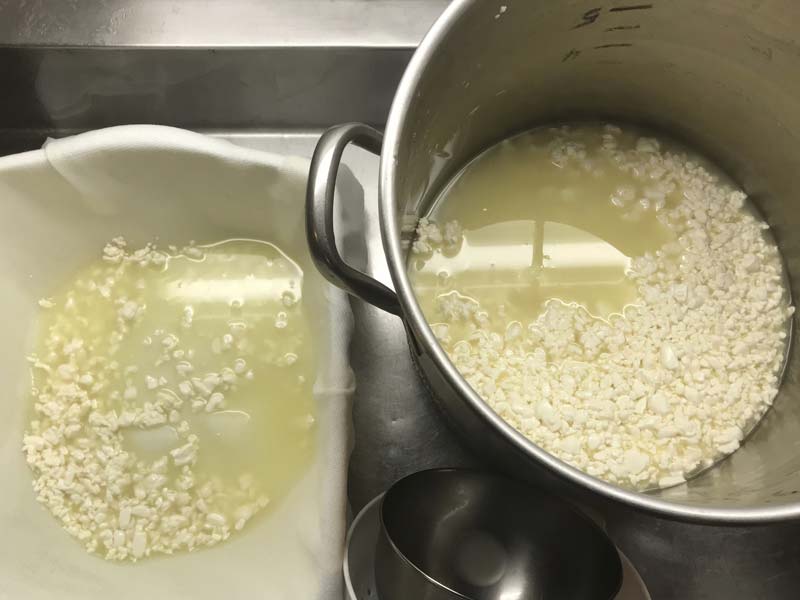
When ready, let curds settle under the whey. Then remove the whey down to about 2” above the settled curds.
-
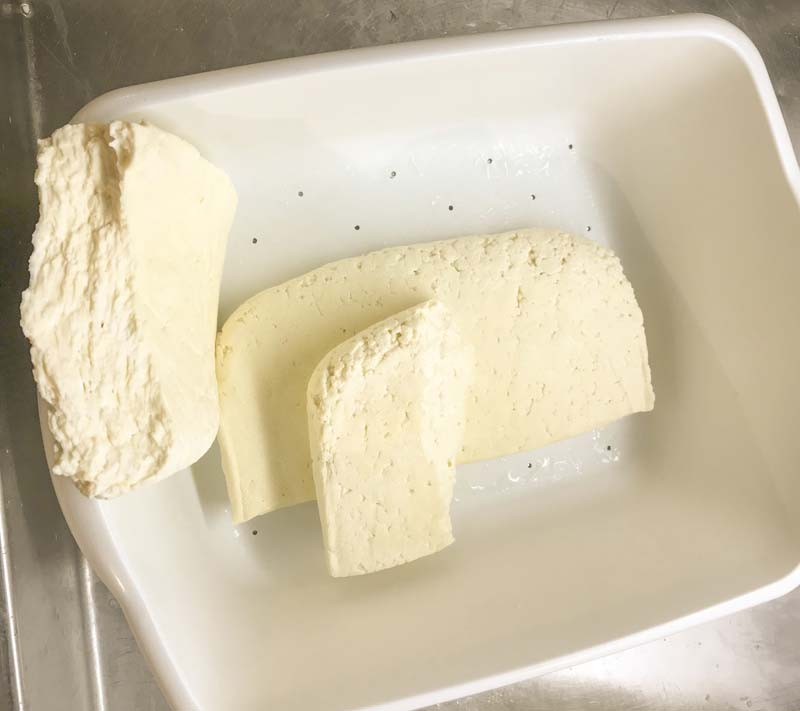
Cheddaring Process
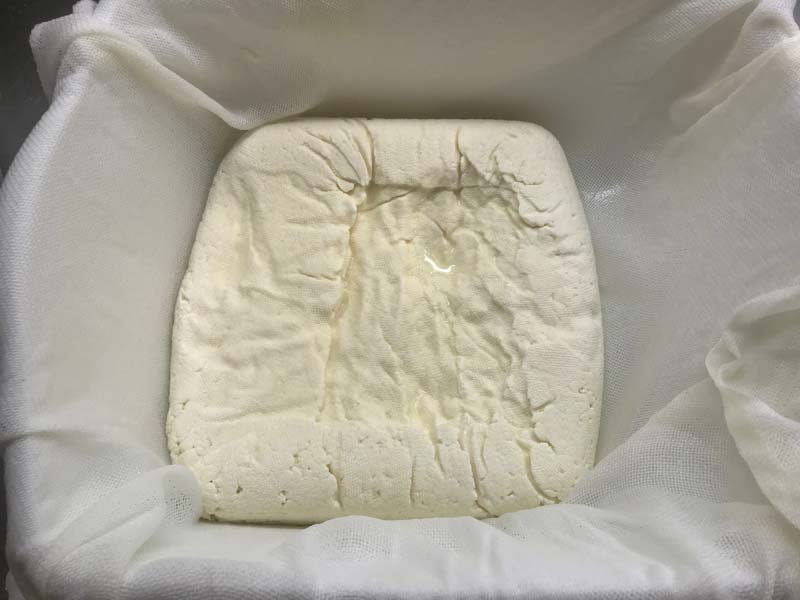
The curds can now be transferred with the remaining whey into a draining tub or colander lined with butter muslin. Gently stir the curds to make sure that the whey drains off well. The curds will initially be suspended in whey as you transfer them. This helps to force out air pockets and results in a tight, compact curd mass.
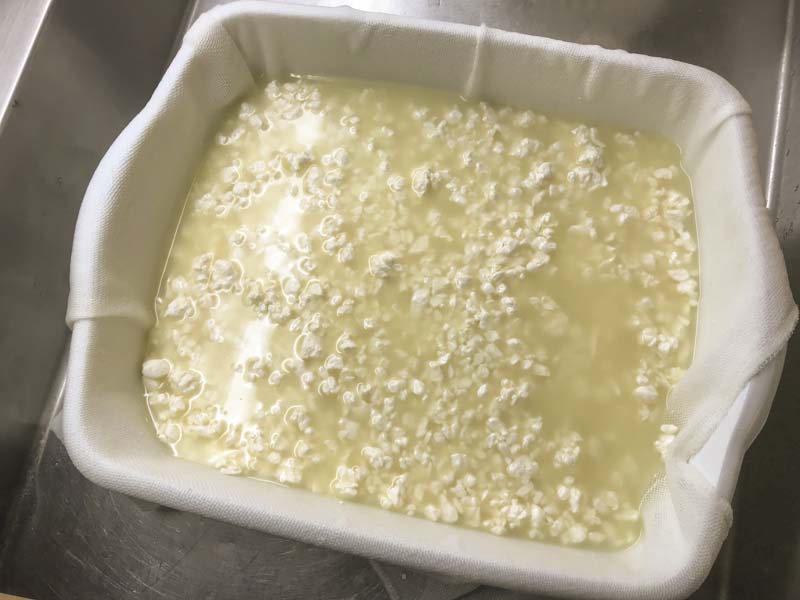
The curds should be allowed to drain for 30 minutes. The draining cloth can be used to tighten the curd mass into a compressed form.
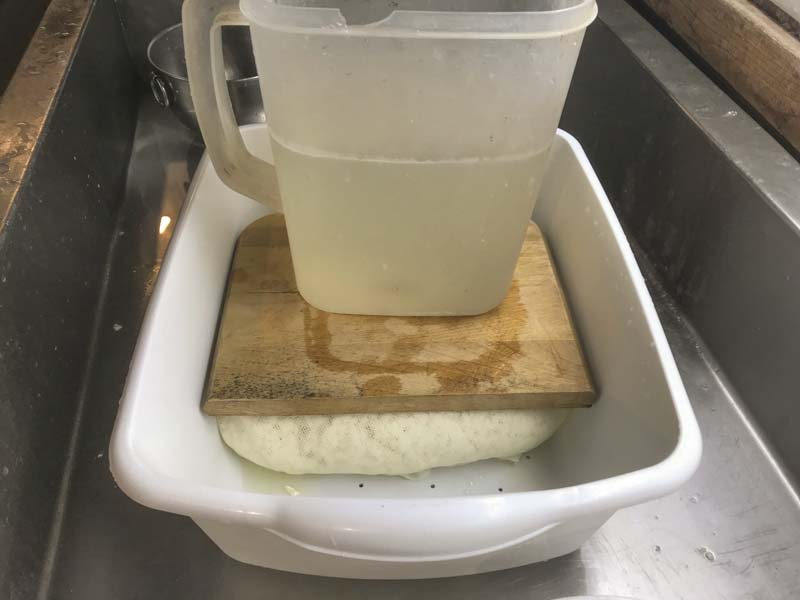
Once curds are compacted, place a board on-top. Add a 1 gallon container of warm water on-top of the board, for added weight. This will make up for the larger curd mass found in traditional large scale cheddaring operations. This is the cheddaring process and will continue 1.5-2 hours.
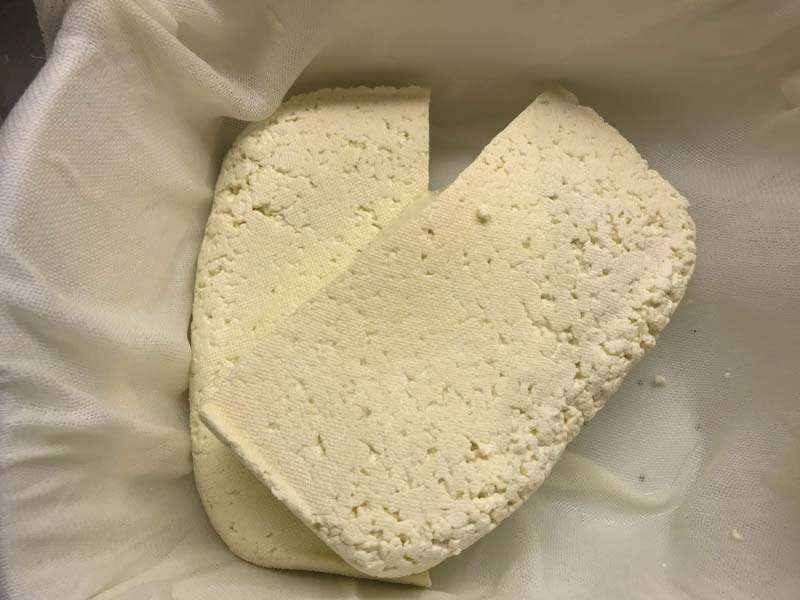
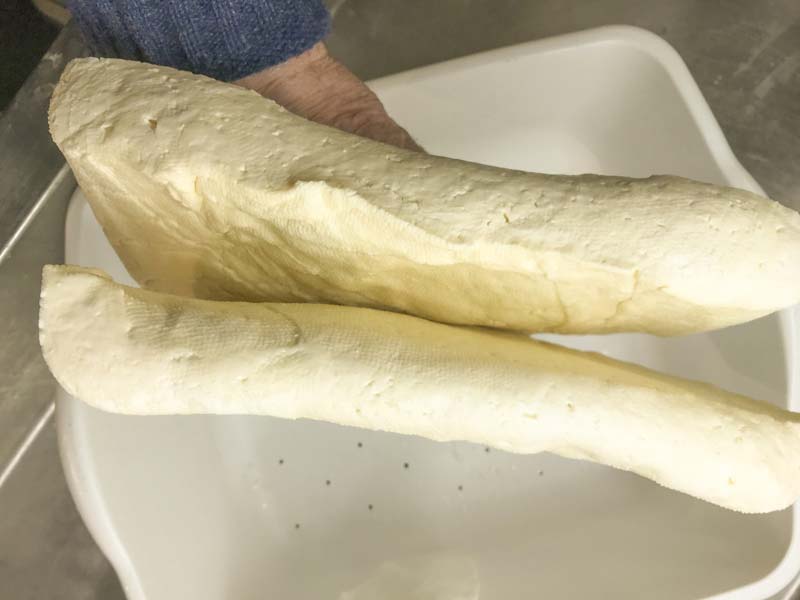
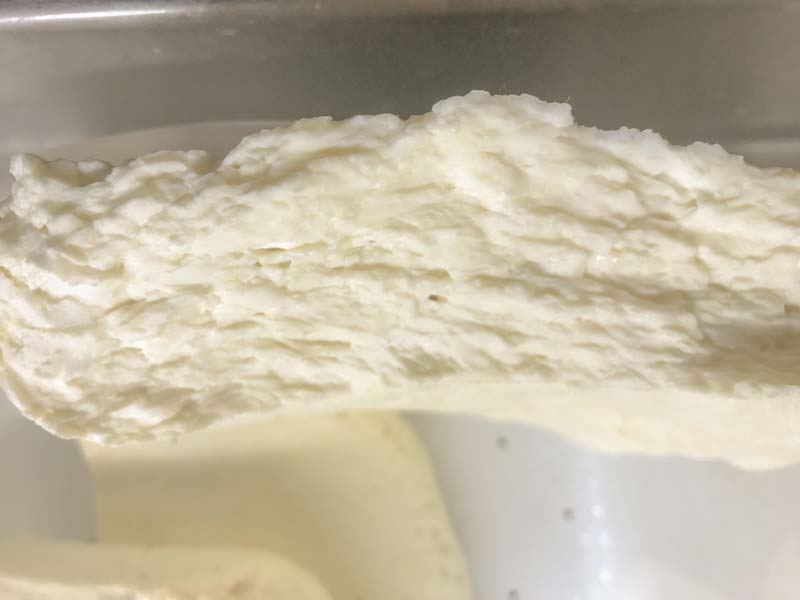
During this time, every 20-30 minutes, the curd should be torn in half and re-stacked to help with even draining. The broken profile will show a very different, linear curd structure. This will be quite different than the initial roundish curds because of the calcium loss. This is the textural process of cheddaring.
While cheddaring, the curds should have residual heat to keep warm so the bacteria can produce lactic acid and reduce the sweetness. As the acid increases, calcium is leached from the curds and the form will change into a much thinner, flatter curd mass.
-
Cheddaring Final Details
The amount of cheddaring is critical to this cheese:
- If the curd has not converted enough lactose to acid, it will contain residual lactose that may undergo late and uncontrolled acid development post pressing in the aging room leading to very chalky, brittle and acid flavors.
- If it converts too much lactose, it will become dry and the slightly sweet milk character we look for in this one will be gone. It will also take much longer to mature in the aging space.
The final moisture and acid condition of cheddaring for this cheese should be a bit different than a cheddar and can be identified with:
- Taste | Think about the neutral point where the original sweet taste of milk becomes tangy, this curd should taste just slightly on the sweetish side of neutral. In contrast the cheddar curd is normally at neutral or just barely perceptible tangy side of taste.
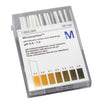
- Empirical Data | Some cheese makers like a definitive measure such as pH or % acid. But, for most, a pH meter is a high expense and using one can be very time consuming to calibrate and clean (bad info is worse than no info at all). I recommend using our pH strips. pH 5.4 will be your ready point for tearing the curd mass into small pieces and salting. I have been monitoring readings of these strips for over 2 years, against pH readings, and find them quite reliable in the range of 5.8-4.0. The higher pH numbers are harder to differentiate with the color separations provided, but the lower range is quite readable.
-
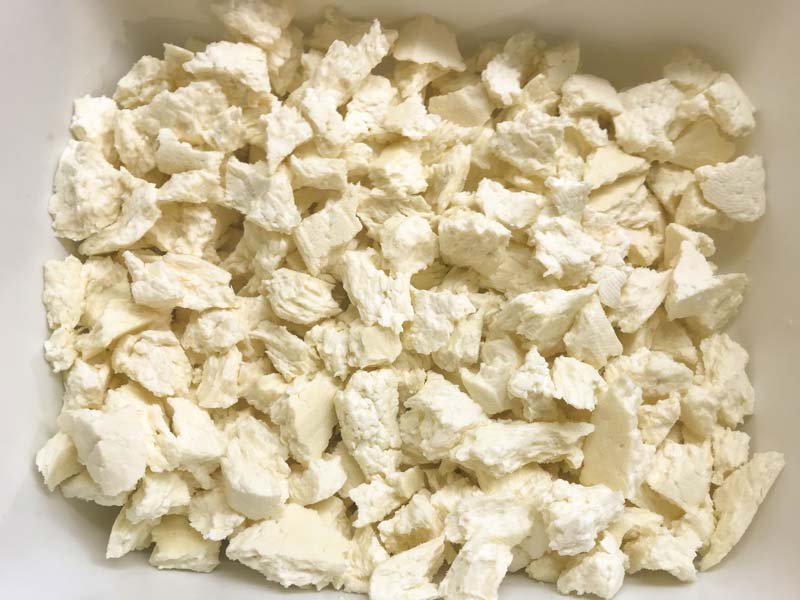
Salting & Adding Spice
In this step the large curd mass will be torn into small pieces and salted to stop the bacteria from producing more acid. The small pieces allow the salt to penetrate quickly as opposed to the weeks a salt brine or dry salting of a large curd mass would take to reach the center.
Tear the curd mass into pieces about the size of the top of your thumb. Weigh the curds and then add about 2.25% of salt based on curd weight. If you don’t have a scale to weigh with, use 2 3/4 Tbs for raw milk or 2 1/4 Tbs for pasteurized milk.
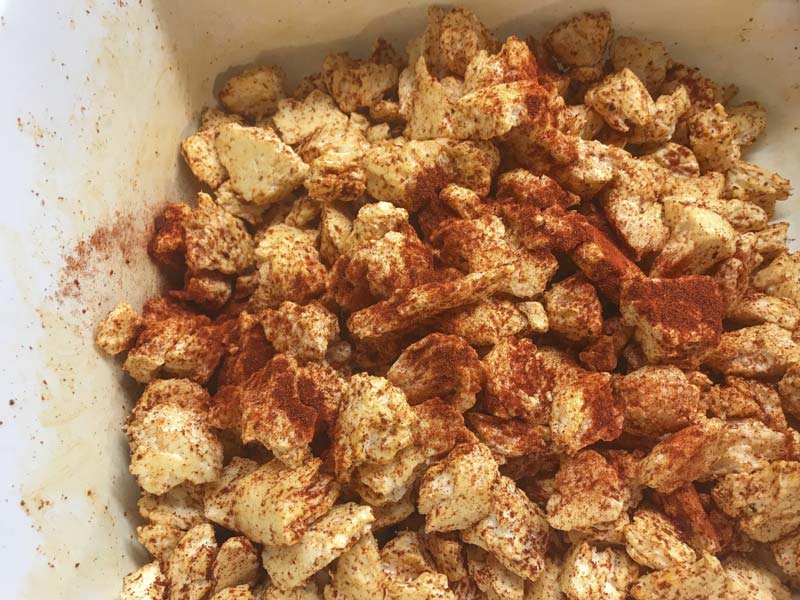
Add about 1/3 of the salt to the curds and mix it in well. Wait until it dissolves before adding the next 2 doses. The reason for this is to not cause a heavy salting that would block the penetration of salt from the surface.
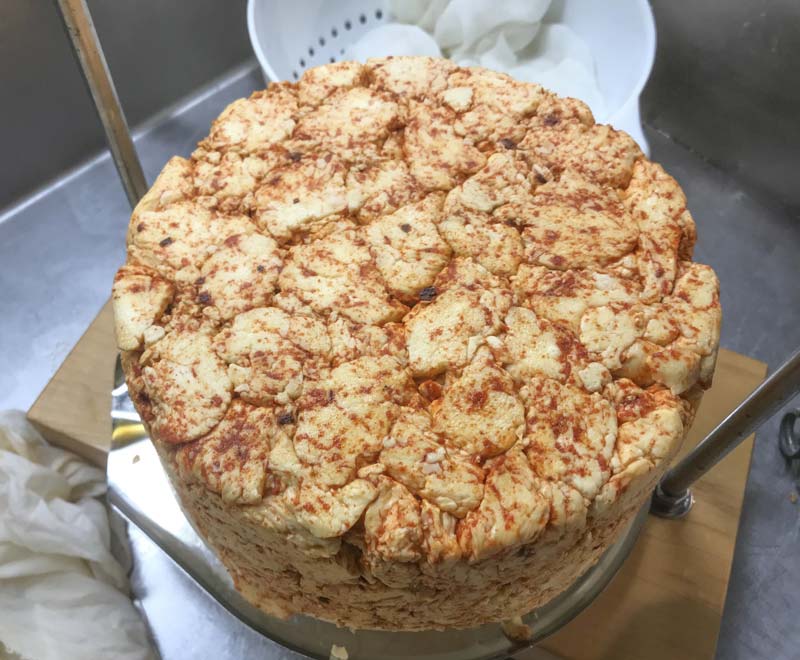
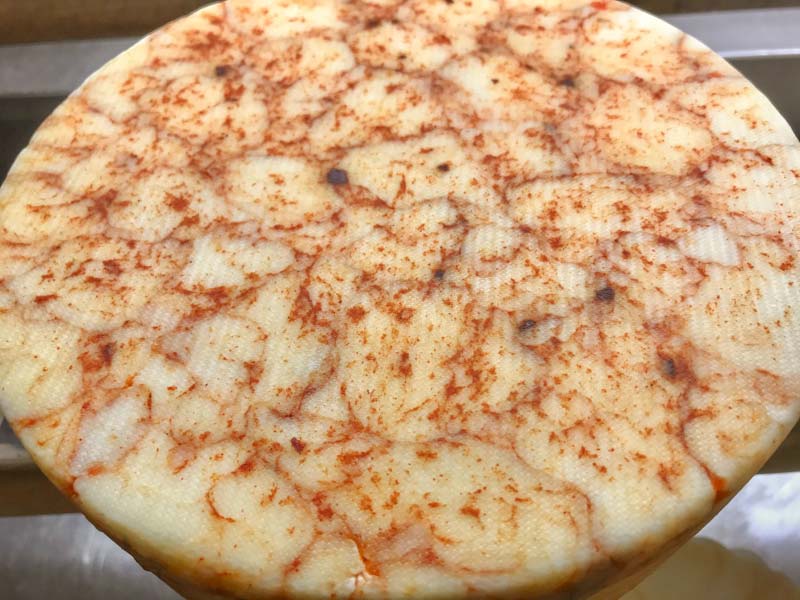
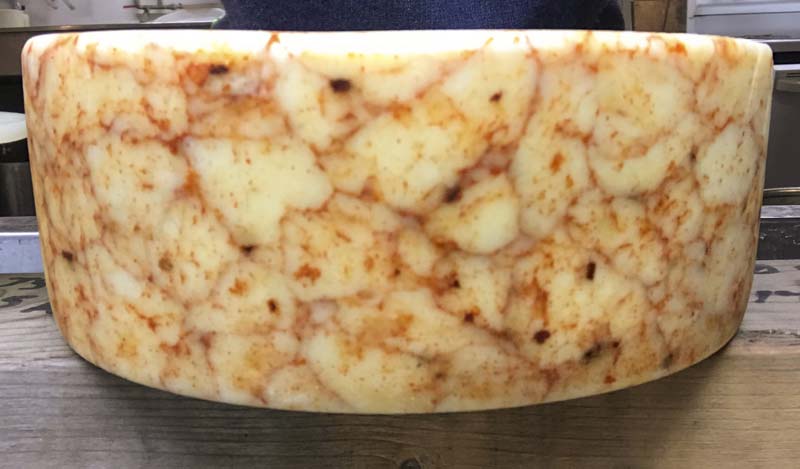
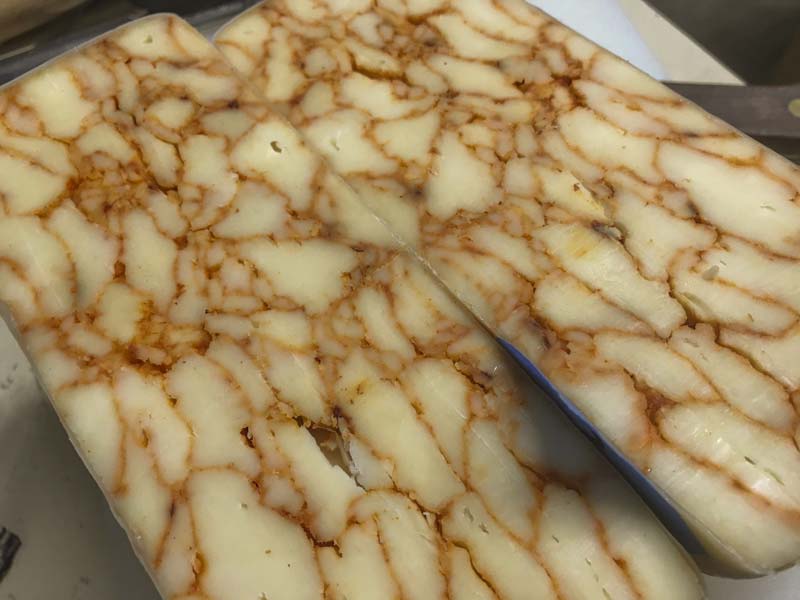
Now add 2 tablespoons of smoked paprika and a finely minced smoked red Jalapeño pepper to the salted curd and mix well. Transfer the curds into a form lined with cheesecloth.
-

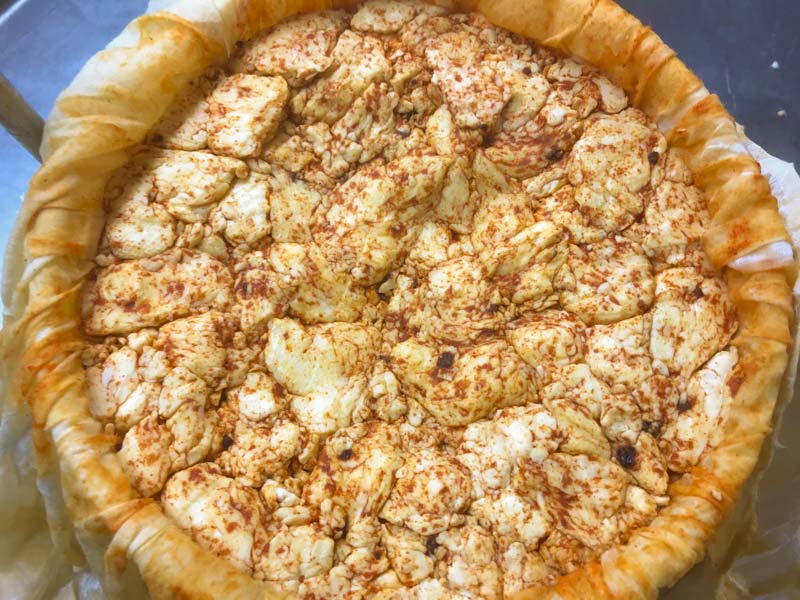
Pressing
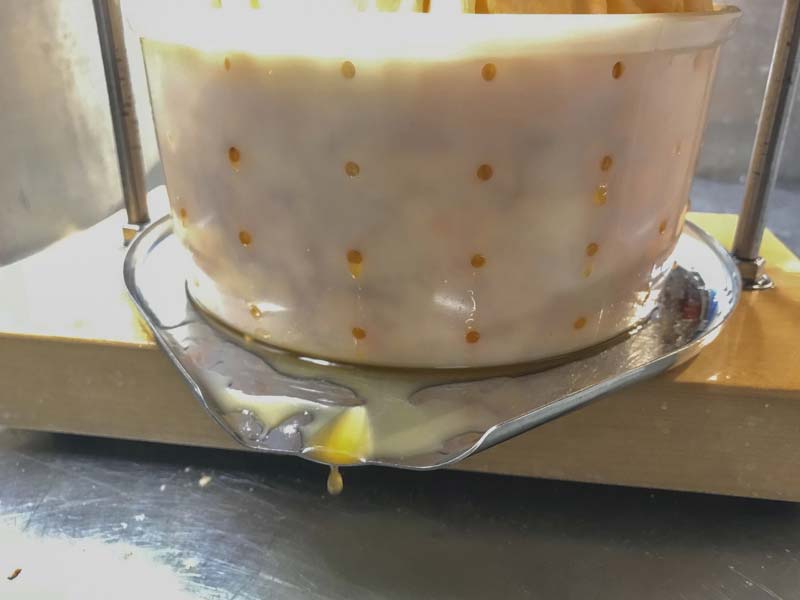
The cheese can now be presses and should be removed from the press, unwrapped, turned, rewrapped, and put back into the press at the below intervals. While pressing, there will be tears of whey weeping from the holes in the cheese mold, these will slow with time, as the residual free moisture decreases.
- 30 minutes at 50 lb
- 1 hour at 75 lb
- 2 hours at 100 lb
- 4 hours at 100 lb
- Overnight at 100 lb
At each turn the cheese will have formed a smoother surface and rest lower in the mold. The final goal is a well consolidated cheese with no surface openings for molds to grow into.
Note: If the curds are too dry, going into the mold, it may be difficult to get a well consolidated cheese. to assure an even consolidation, the final pressing may need to be extended to several days and the weight may need to be increased.
-
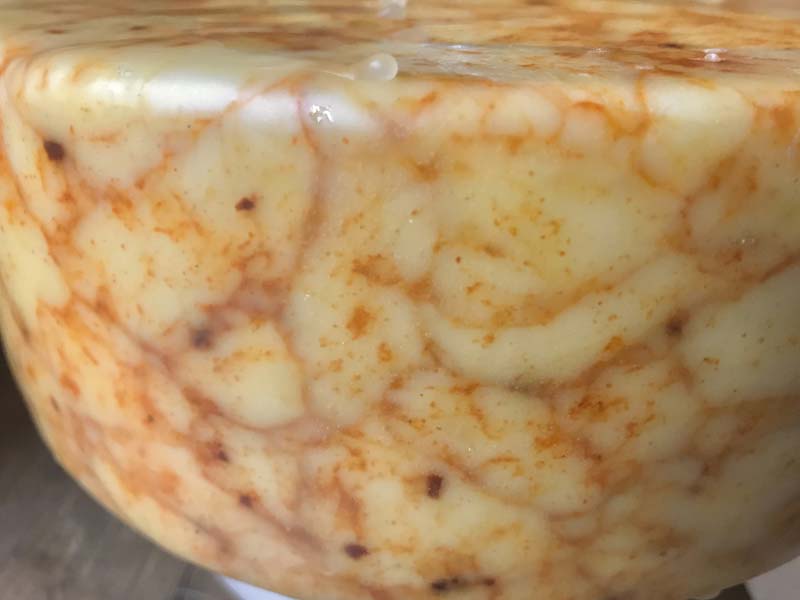
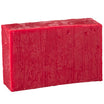
Waxing & Aging
The cheese can now be waxed. All of our details for this are on our Waxing Page.
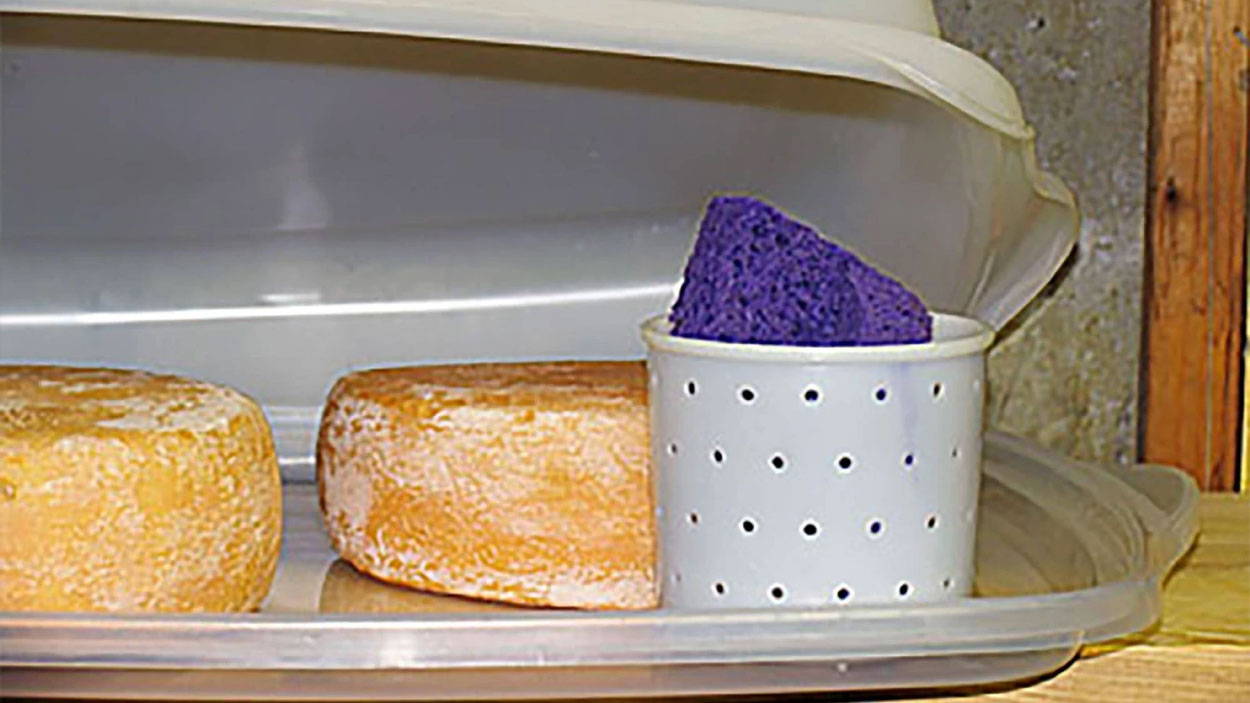
After waxing, place the cheese in an aging space at 52-56F with 80-85% moisture for at least 2-3 months.
The only maintenance required is to turn the cheese every week to keep the moisture even.
The waxed cheese should remain mold free if done correctly and fully sealed.
Cheese Making Supplies
Popular Products
Cheese Making Recipes
Recommended Recipes
Learn how to make a cheese cave right at home. If you want your cheese to ripen properly you have to make them a good home and take care of them like little bambinos.