


Ingredients
Total price for selected items: Total price:

Instructions
-
Acidify & Heat Milk
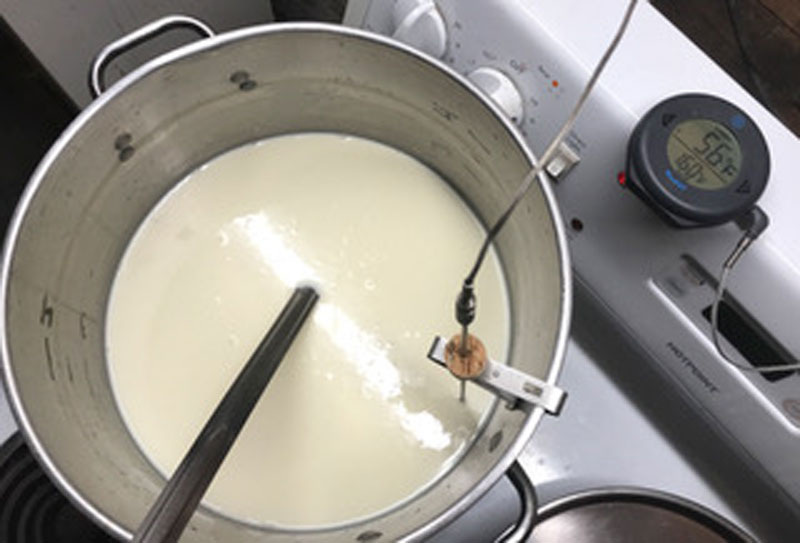
Heat 2 gallons of milk to 98F by placing a pot of milk in a sink (or larger pot) of very warm water or by heating the pot of milk directly on the stove. Heat the milk slowly and stir it regularly if heating directly on the stovetop.
If using pasteurized milk, add ½ tsp of calcium chloride as the milk is heating.
Once the milk reaches 98F add the culture, let re-hydrate for 2 minutes, and then mix it in for 2 minutes.
After adding the culture let the milk sit quietly at 98F for 60 minutes. The milk needs to be kept at this target temperature while the culture establishes itself and begins to work.
Culture info: Below is a list of alternative culture if you do not have TM81 or C201 culture:
- 3.5-5oz Prepared Yogurt Y1(Only 30 minutes of ripening time is needed, since the culture is already active)
- 1/8 tsp Thermo B
- 1/8 tsp TA 62 (Fast acid production with minimal protein/texture breakdown for a softer cheese. If a harder/drier/lower moisture mozzarella is desired, use one of the other cultures)
-
Add Rennet
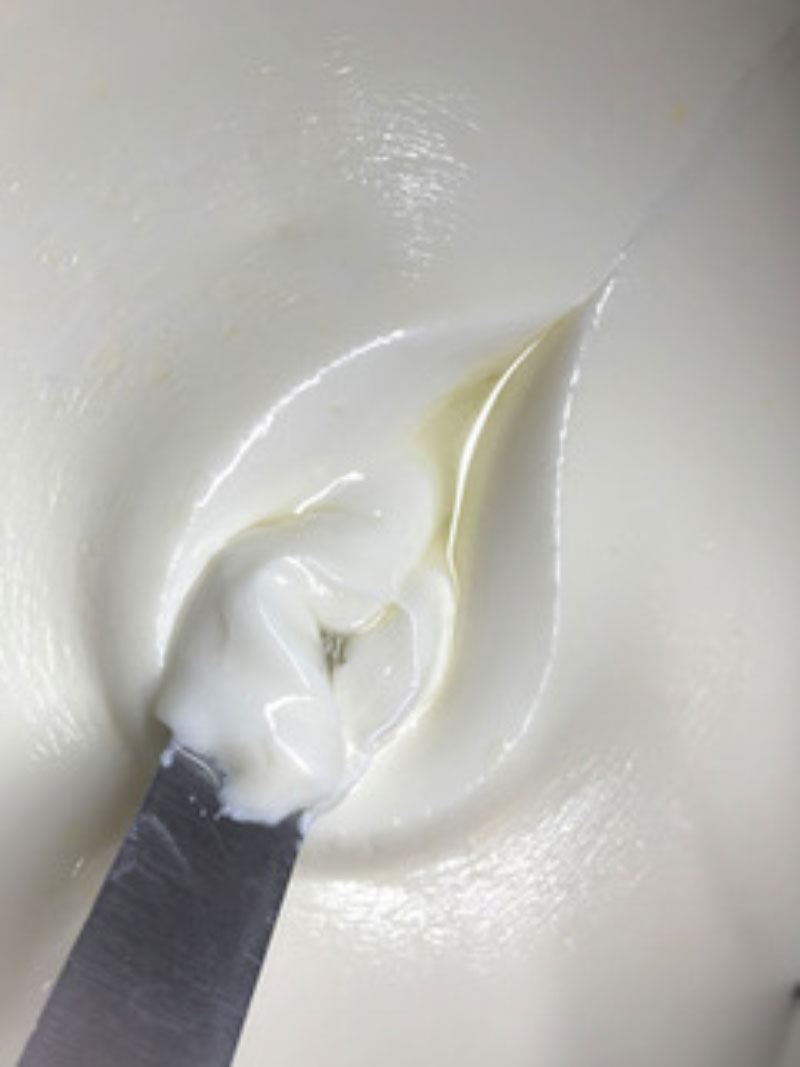
Add single strength liquid rennet to the milk and slowly stir in a bottom to top motion for 1 minute then let the milk sit quietly for 24 minutes.
The thermal mass of the milk should keep it warm during this period. It’s ok if the temperature drops a few degrees. The milk will begin thickening after 8 minutes, but allow it to coagulate to full firmness before moving on.
After 24 minutes check for a firm coagulation, if the curd is not set allow the milk to sit for as much as 50% longer. If needed, the next time you make the cheese, adjust the rennet amount (more rennet for a quicker set and less for slower set).
-

Cut & Stir
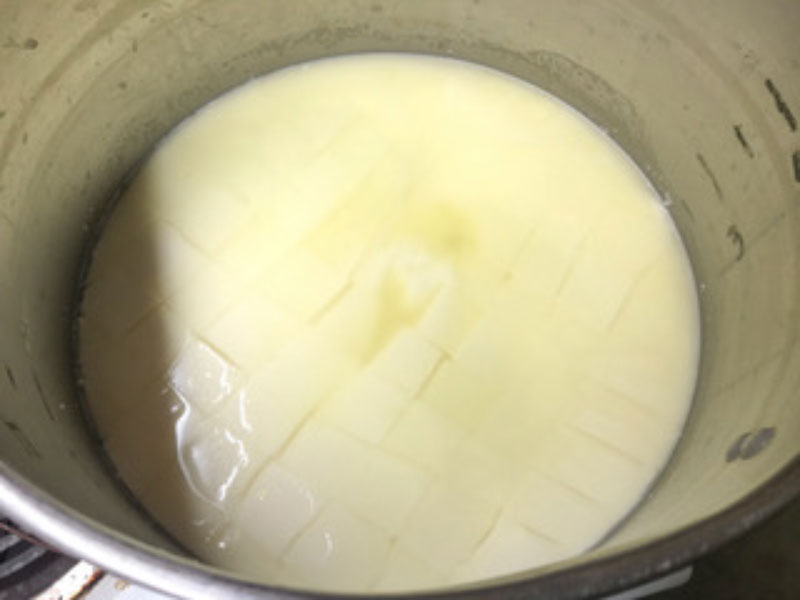
Once the milk has set well, cut the curd mass as evenly as possible into 1” pieces. After cutting let the curds rest for 5 minutes.
Next cut the curds into smaller 1/2-5/8” pieces (hazelnut size).
Let the curds rest for 10 minutes. If the temperature has dropped, slowly reheat the curds back up to 98F during the 10 minute rest.
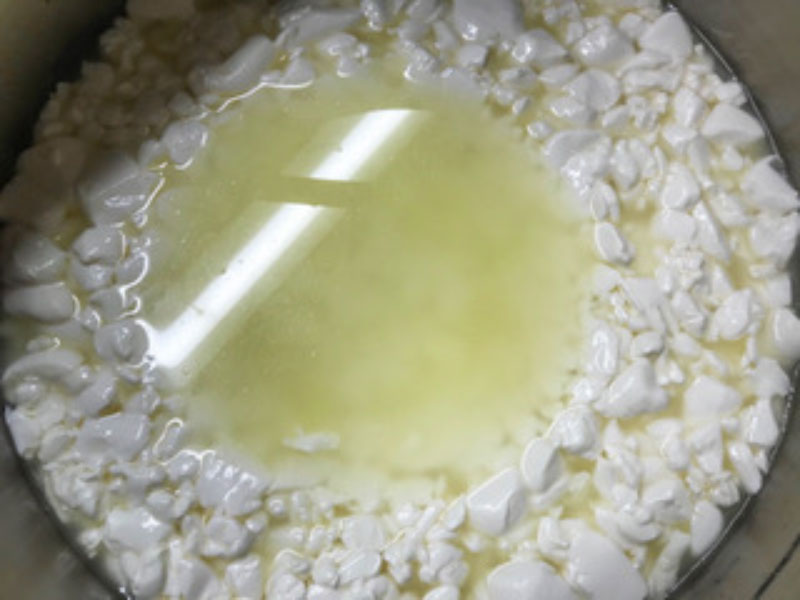
Following the rest slowly stir the curds for about 10 minutes. This helps to control the moisture in the final cheese. A longer stir will make a drier cheese. More or less time may be needed depending on the milk, and desired moisture in the final cheese.
After the short stir allow the curds to settle to the bottom of the pot.
-
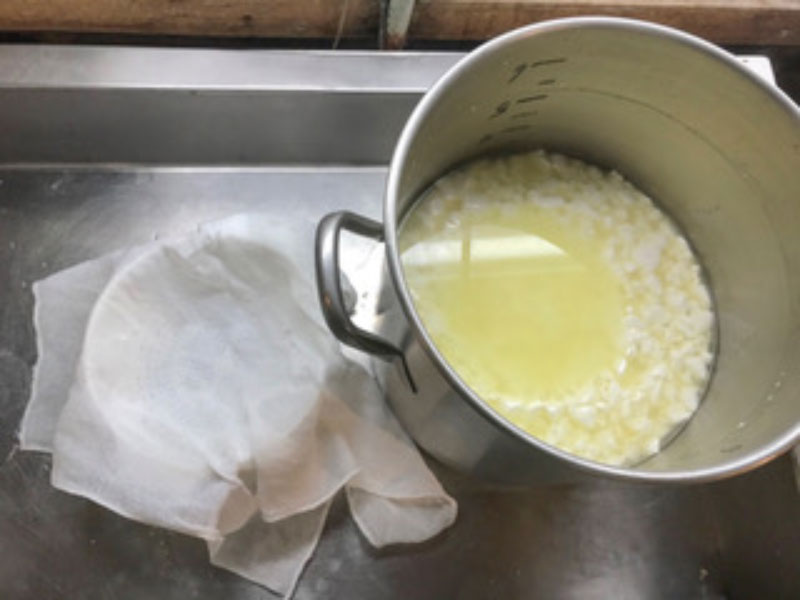
Transfer Curds
Drain the whey down to the surface of the curds, then transfer the curds into a cloth lined colander or perforated draining pan. Consolidating the curds like this will limit moisture loss while the acid develops.
Note: Mozzarella needs proper moisture content and acidity to become stretchy. This step will help adjust the moisture through draining, and acidity through incubation.
At this point the curds will have released enough moisture, but have not developed enough acidity to be stretched. If tasted, the curds will still be sweet because very little lactose has been converted into lactic acid.
-

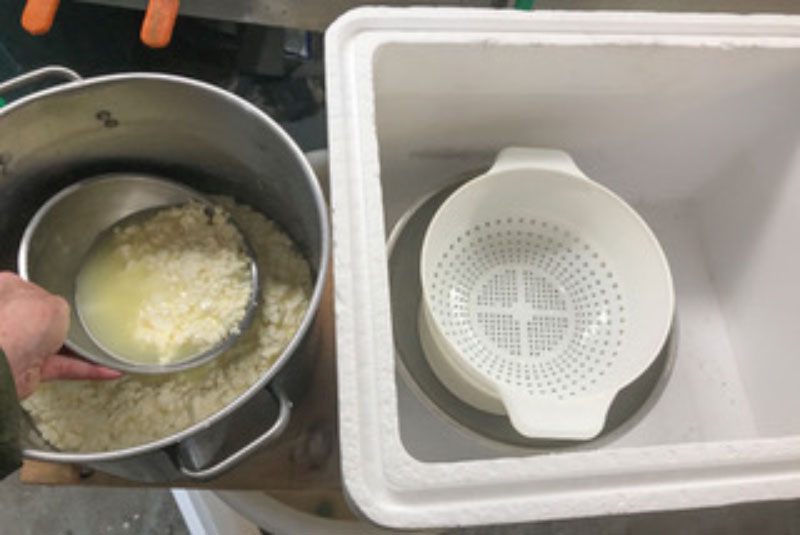
Ripen Curds
The drained curd should be incubated (kept warm) at 90-95F for 2-2 ½ hours. Turn the curd mass every 20-30 minutes for even draining.
Tip: Incubating in a cooler with bottles of warm water is an easy way to keep the curd warm. Suspended the curds above a pot of warm water or whey will also work.
During this time the acidity will begin increasing. Too little acid and the curd will not stretch, too much and the mozzarella will taste sour and lack structure.
While waiting, heat a pot of fresh water to 160-165F for stretching, in the next step.
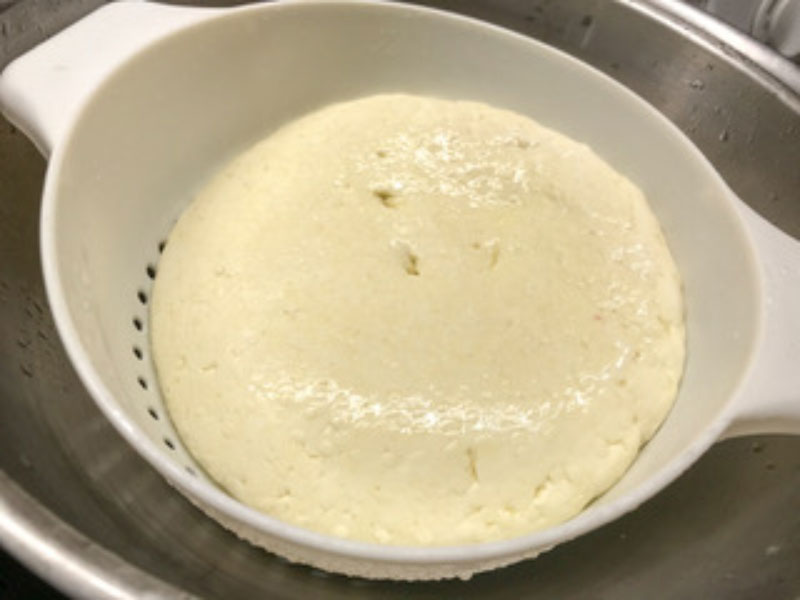
After 2-2 ½ hours the curd can be tested for a proper stretch.
Optional: If available a pH strip can be used to check the curd, when the pH strip reads 5.3 the curd can be removed from incubation.
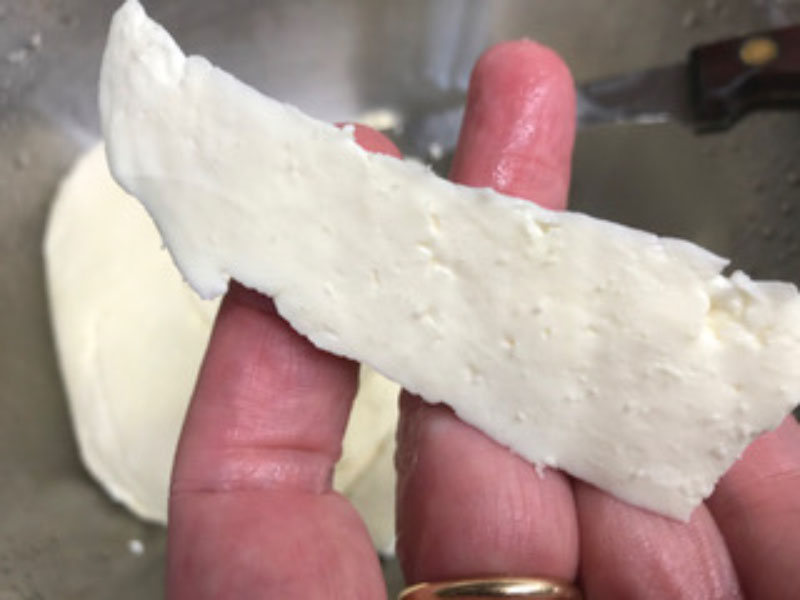
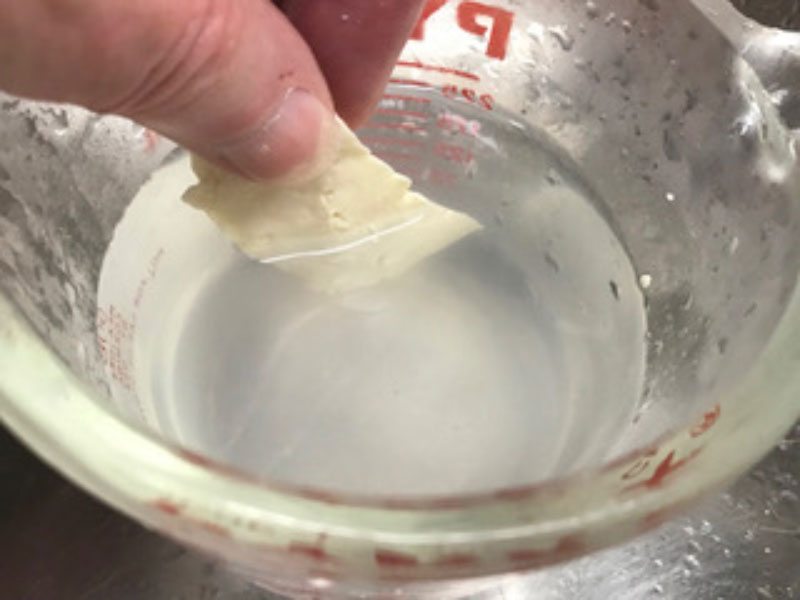
When ready cut a thin strip of curd, dip it into the hot water (160-165F) until thoroughly heated. Once heated the curd should stretch easily under its own weight and should stretch out considerably when pulled. If the strands break quickly, it needs more incubation time. This test may need to be done several times, but it’s better to start too early and do several trials than to wait too long.
Once the curd stretches properly with the hot water test it’s time to move onto the next step.
-
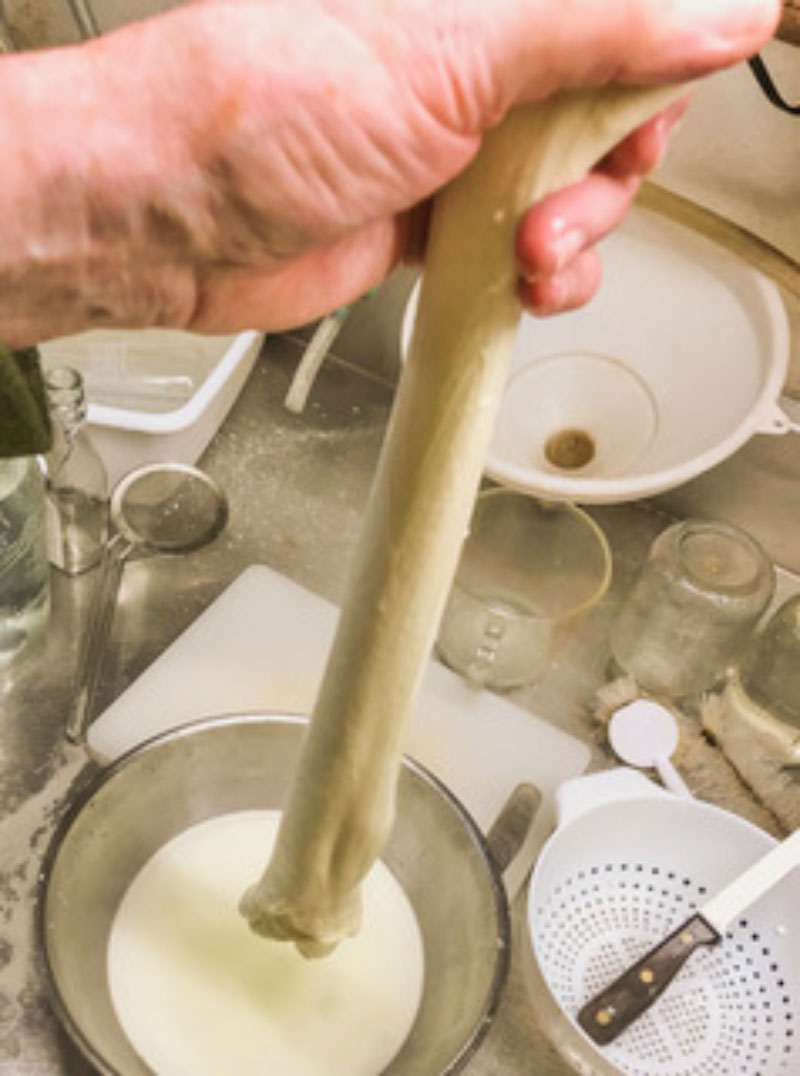
Heat & Stretch Curd
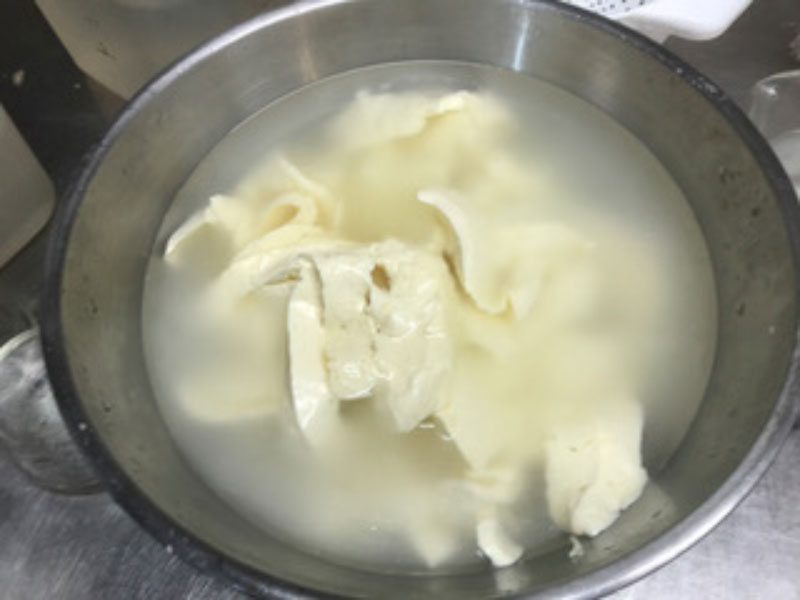
Grab a bowl or pan and begin cutting the curd mass into thin strips, pile the strips loosely into the bowl.
Once cut, add enough hot water (160-165F) to cover the curds and heat them thoroughly. Do not pour water directly on the curds, but around the edges. Keep the curds separated to for allow even heating.
Keep the curds submerged until they all are stretching well. Take a moment to test several pieces to see if they stretch into long strands without breaking. Patience is important here.
If the curds resist stretching, pour off some water and add fresh hot water as needed.
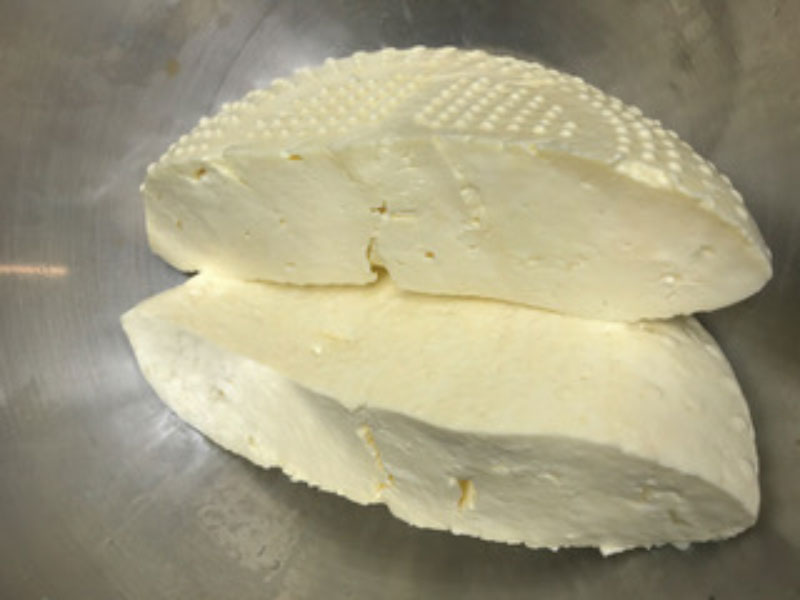
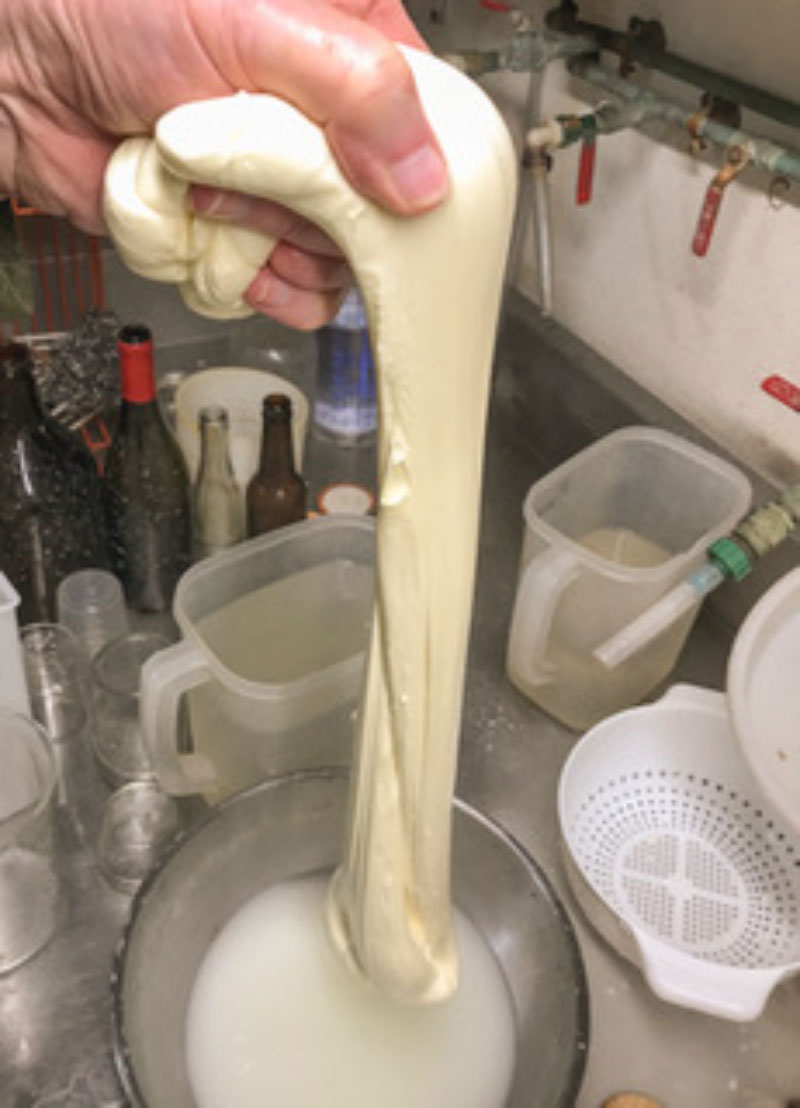
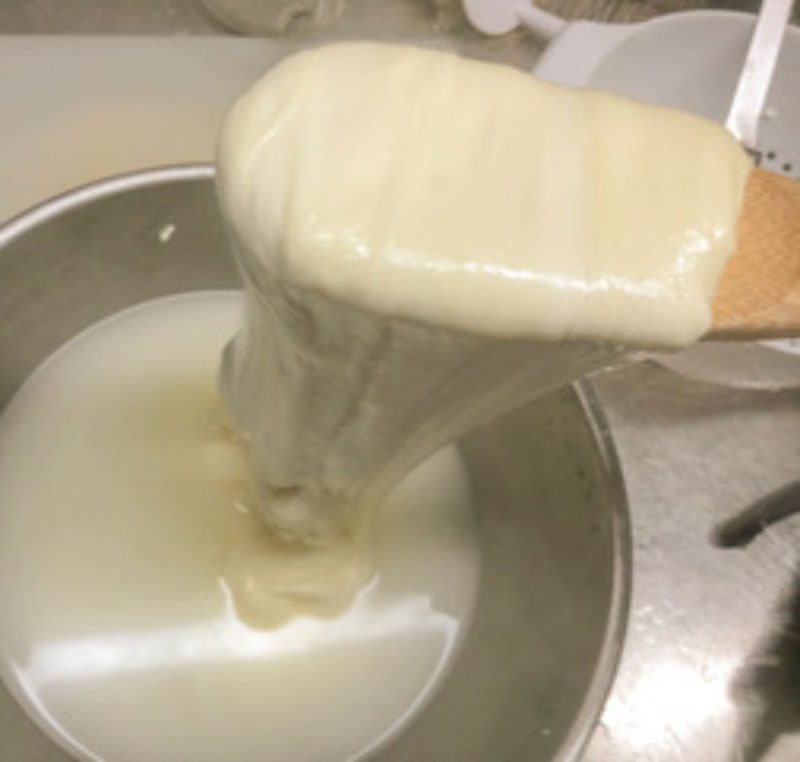
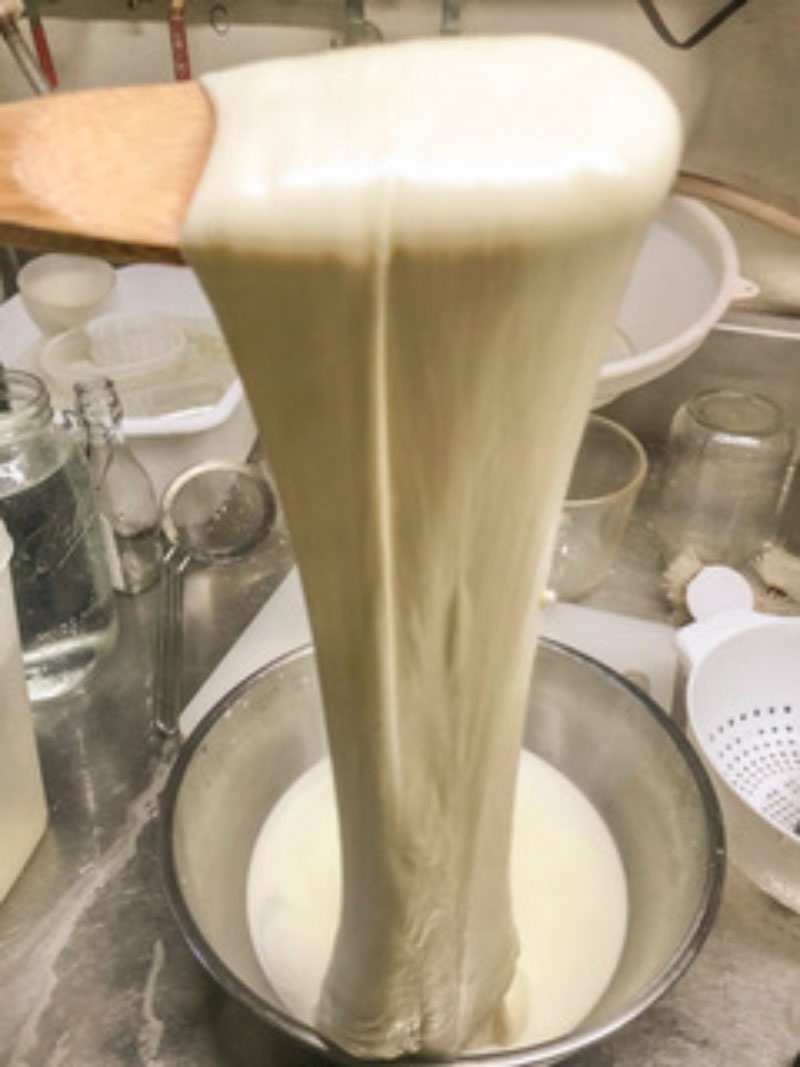
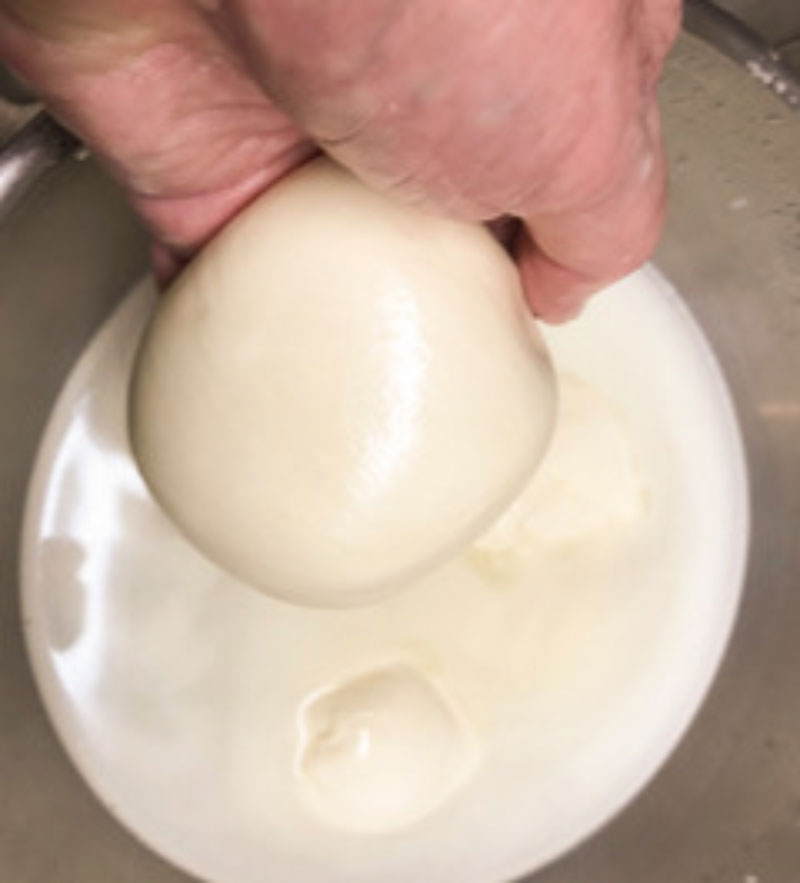
When all the curds are ready to stretch gather them into a mass and lift them up. Initially let just the weight of the curd mass stretch itself. As the curd stretches fold it back together. Repeat this several times until the curds fully join together and the texture becomes smooth and elastic.
When the curd surface becomes very glossy and smooth it’s ready to form.
Note: If stretched too much the curds will toughen, making the resulting cheese excessively dry.
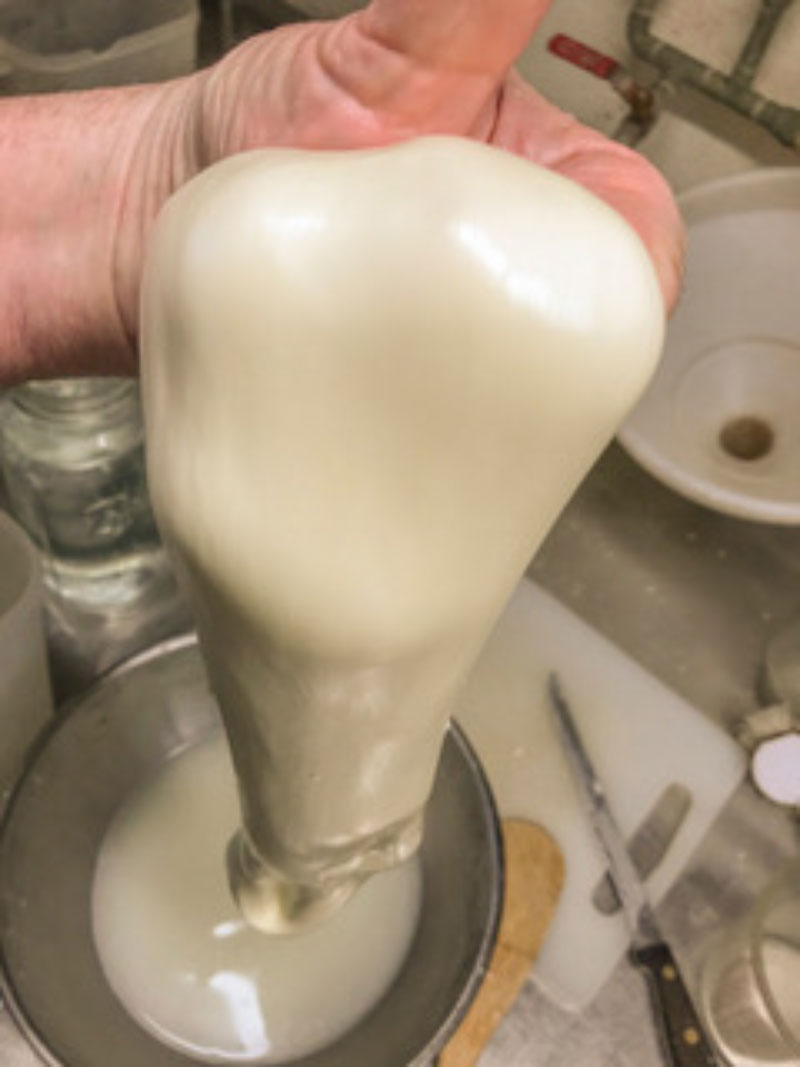
When ready, form the stretched curd into a ball or cylinder by folding it into a compact shape one last time. While forming the shape gradually turn the compact curd in on itself and stretch to a smooth outside surface. This quickly forms a jug shaped mass with a neck that can be squeezed slowly. This technique for shaping your cheese may take a few trials to perfect.
Tip: If the curd resists and becomes too cool while being formed, remember to keep placing it back in the hot water.
Info: It’s important to stretch the curd mass well in order to rearrange the protein structure for a drier pizza style, grating cheese. This process transforms an unorganized curd structure into an elastic mass that joins together when stretched and squeezed.
-
Shape, Chill & Salt
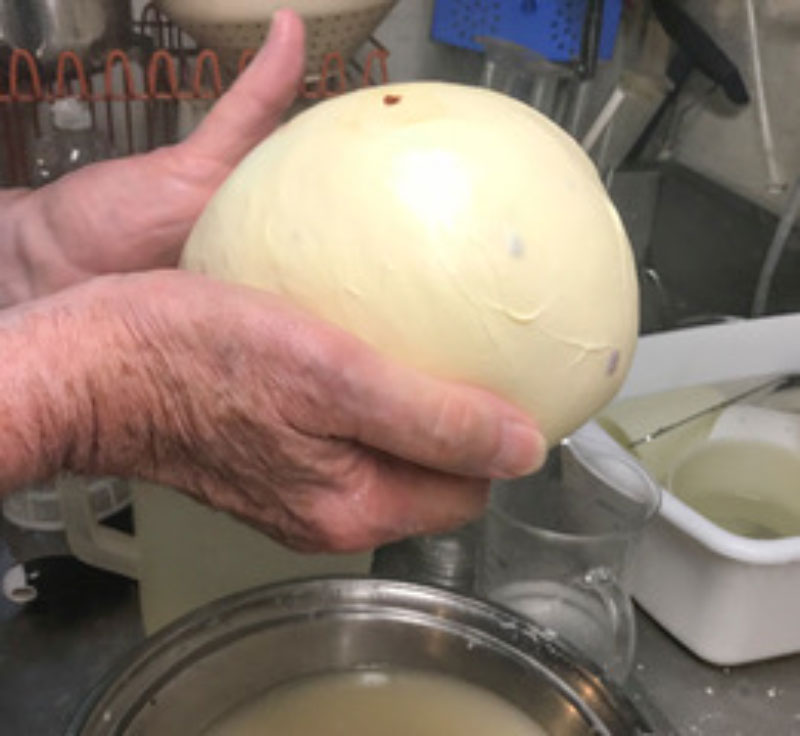
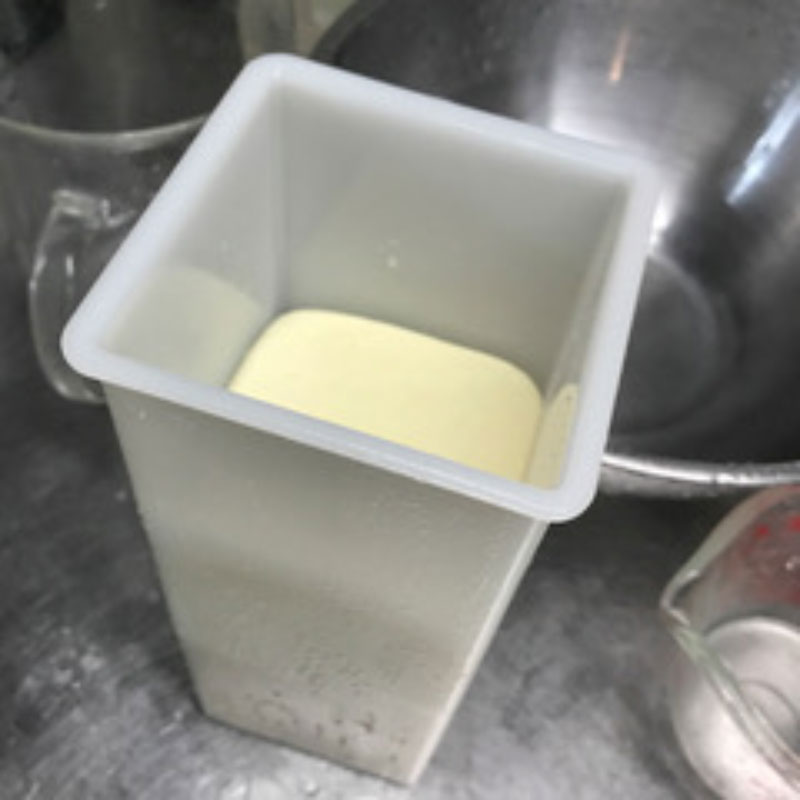
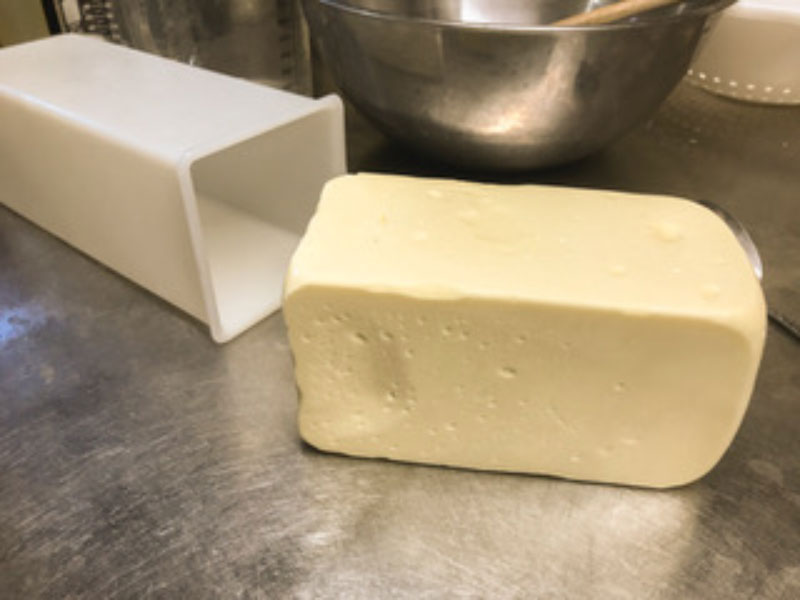
If desired, the cheese can be shaped further by placing it into a mold submerged in hot water. To form the mozzarella into a tall square mold, simply let the hot curd mass stretch itself into a longer, sausage-like mass, and drop it into the mold. Then let the cheese relax into the mold for about 15 minutes. Don’t leave it too long in the hot water, or the surface will soften as calcium is leached from the cheese.
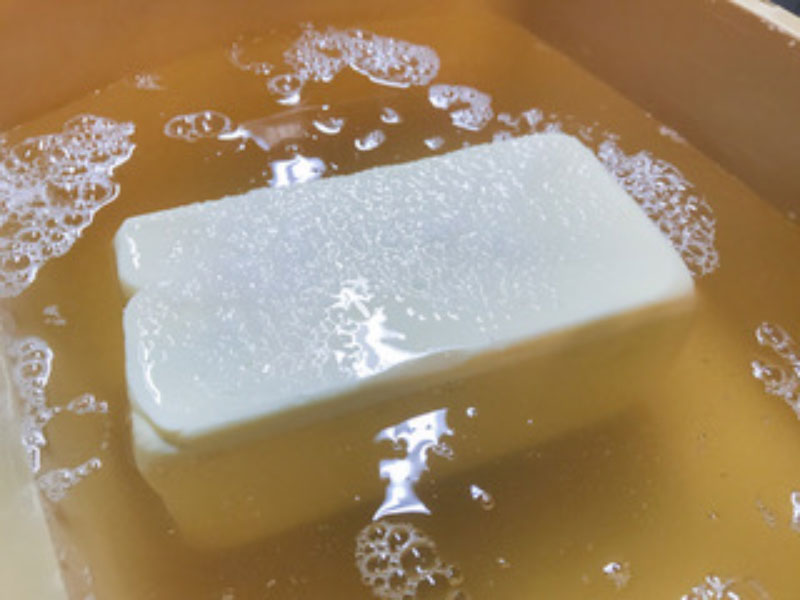
Now the formed cheese needs to be cooled in very cold water to stabilize its form, and then be soak in a saturated brine for flavor.
Transfer the cheese into a basin of ice cold water, and let it chill. Then transfer the cheese into a saturated brine at 50-52F for 2 - 2 ½ hours.
Note: Since the curds were heated to a high degree, the function of the salt is more for flavor than to stop any culture activity, so adjust the brining time simply to taste.
-

Aging
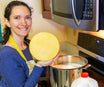
Remove the Mozzarella from the brine, and let it dry on a draining mat until the exterior has dried slightly, a few hours to a few days. When ready the cheese can be wrapped in saran wrap or coated in cheese wax (for longer storage) and stored in the refrigerator to age for 10-14 days.
During this time, enzymes in the mozzarella will begin breaking down fats and proteins into different chemical components, result in a soft texture, high aroma, and strong, more piquant flavor.
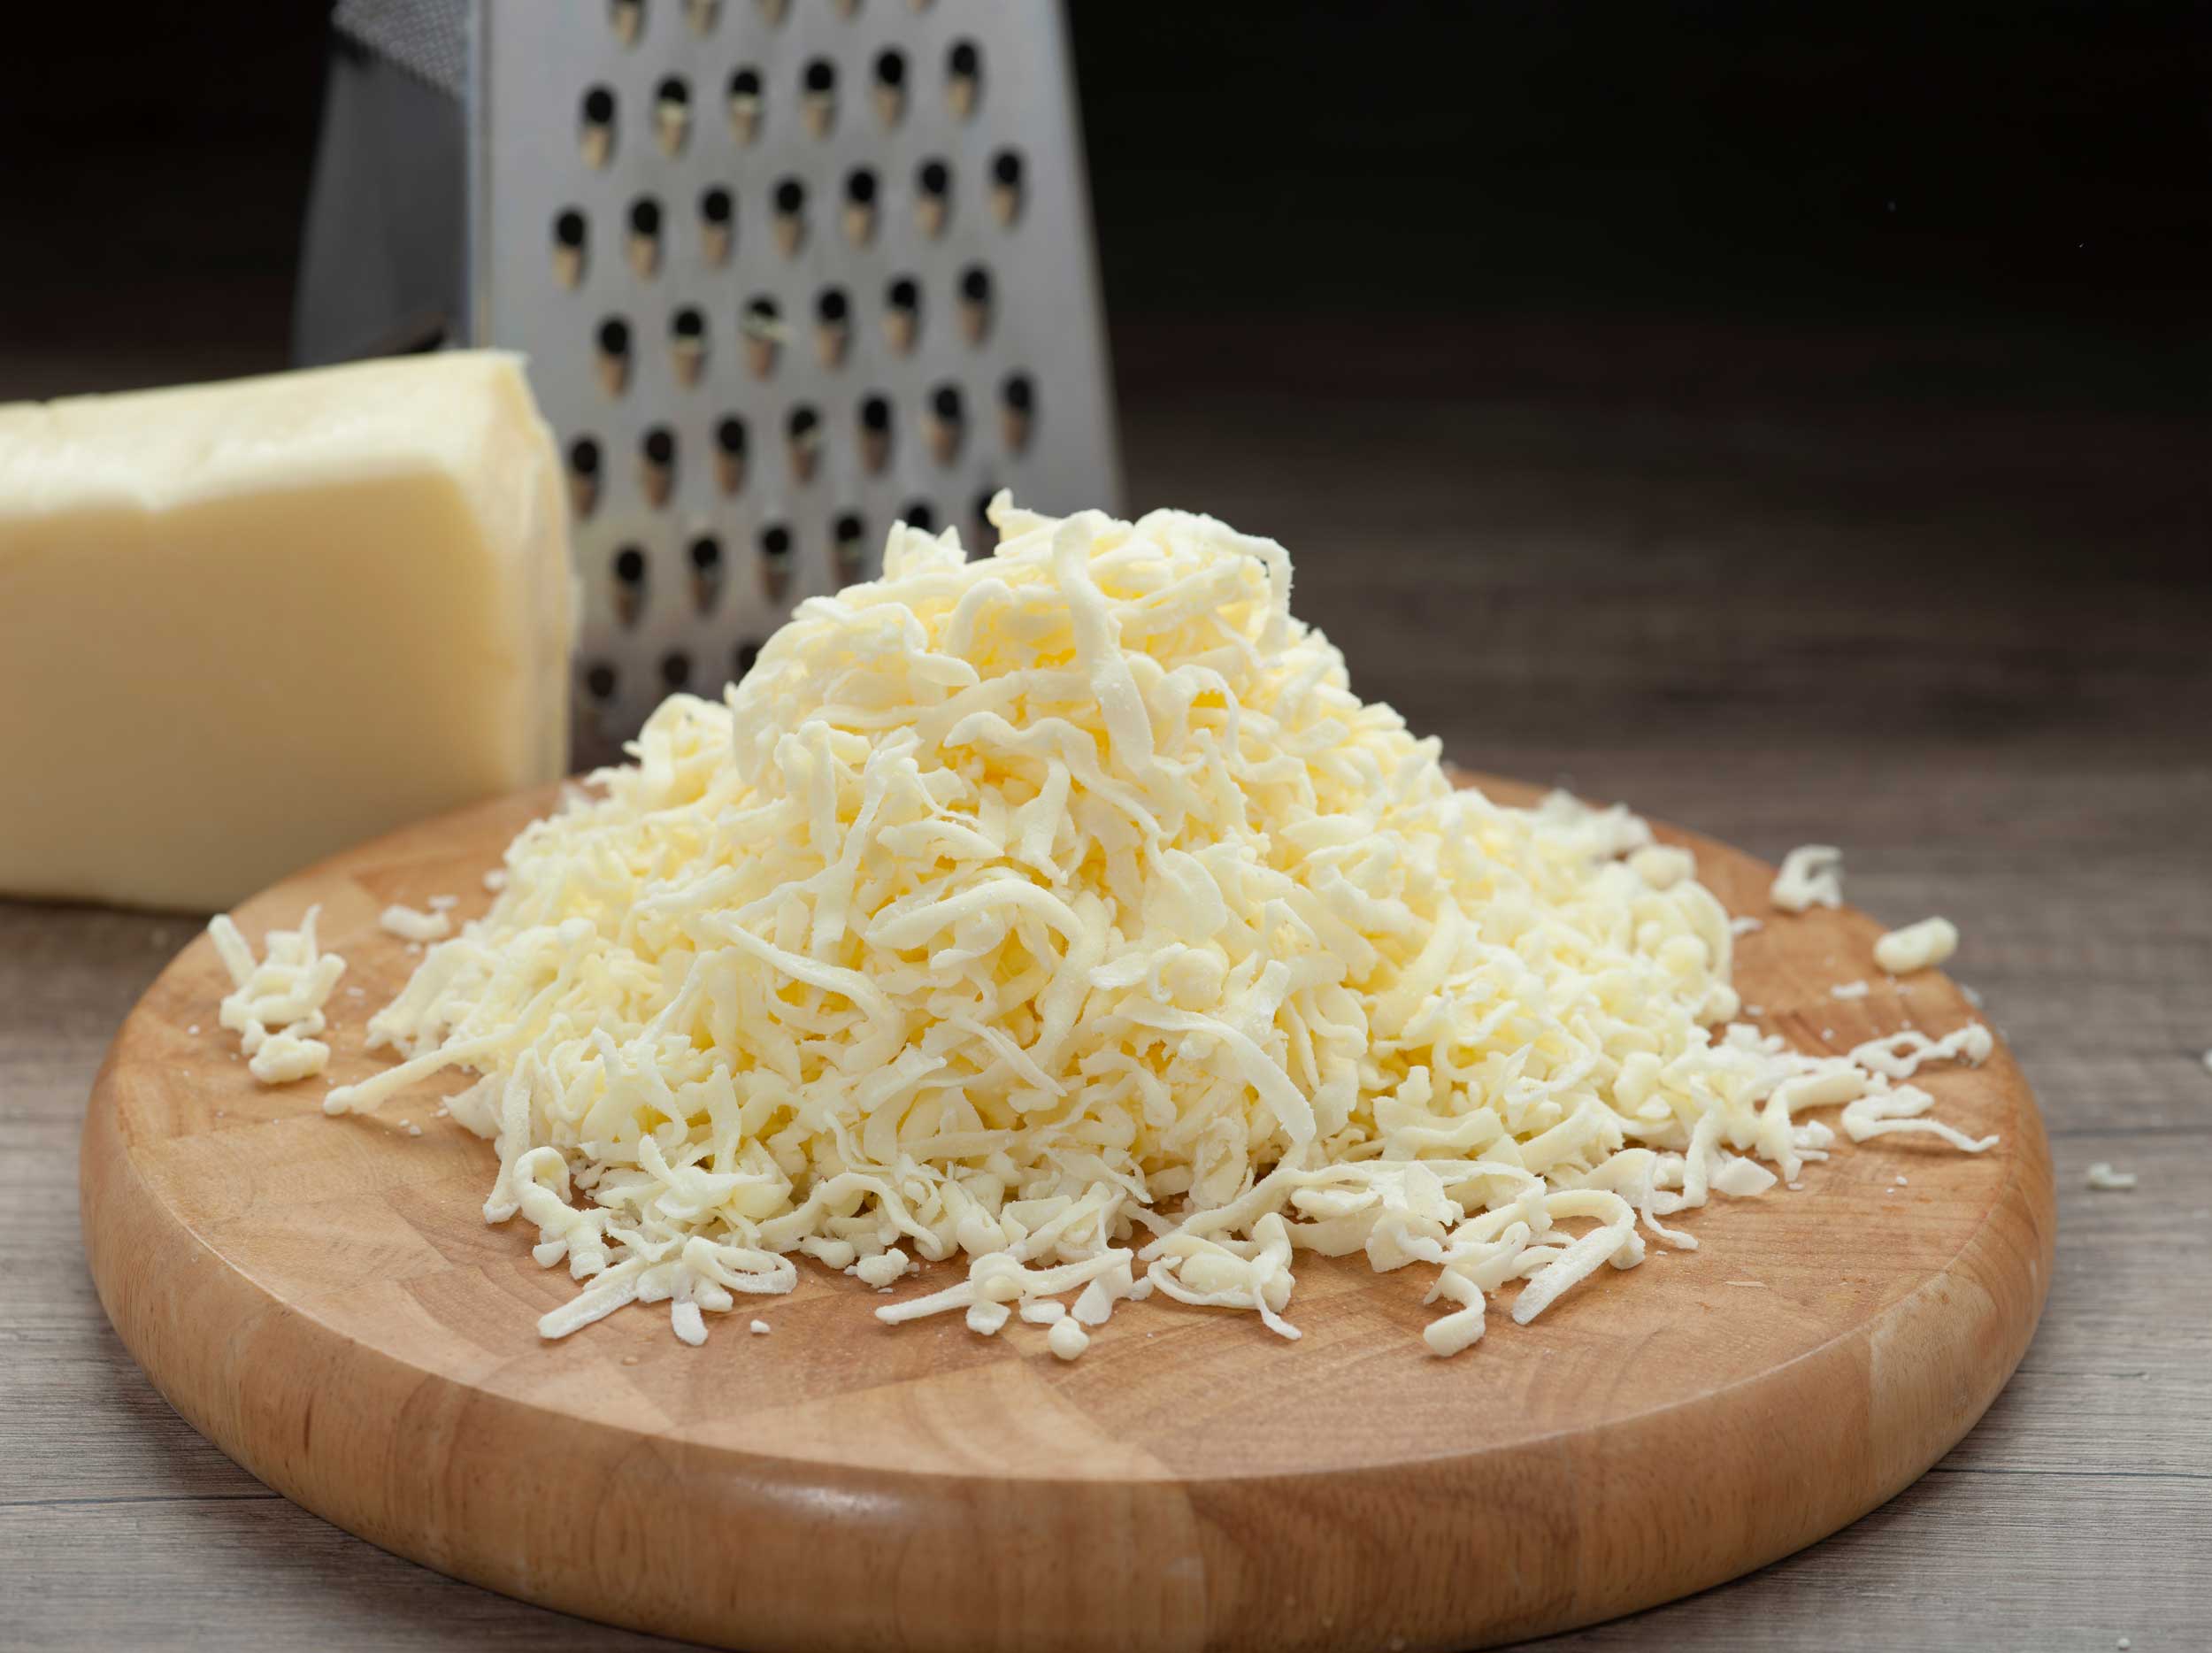
Info: When done the cheese will be leaner and drier than a fresh Mozzarella resulting in a firmer that’s easy to grate. It will stretch well, not add excess oil to pizza, produce minimal bubbling, and is not easily scorched.
Here are a few things to note with the finished cheese:
- More fat and moisture in the finished cheese will make it age quicker. Higher salt will make is age slower.
- Too much salt will cause black, burnt spots when baking.
- Warmer aging goes faster, but if it’s too warm it may develop gas (enough to split the cheese) or objectionable, “off” flavors
-
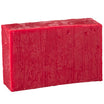
Most firmer Mozzarella comes out of the brine as ‘green’ (unripened) cheese and is
quite bland. This cheese needs 2-4 weeks of aging at 36-40F, and should be
used within this window of time.
For comparison, drier cheeses like Cacciocavallo and Provolone should be aged for 2-8 months. Moister cheese like Scamorza need little to no aging, but should to be used within 10 days from production.
Cheese Making Supplies
Popular Products
Cheese Making Recipes
Recommended Recipes
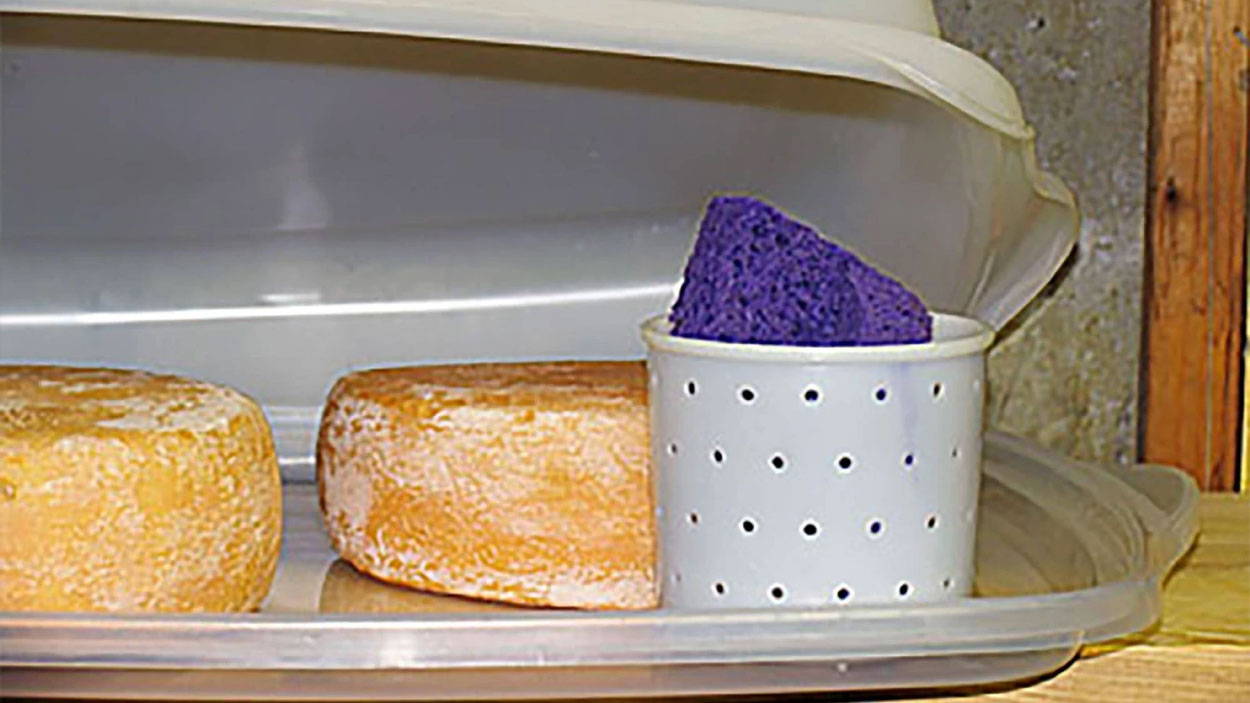
Learn how to make a cheese cave right at home. If you want your cheese to ripen properly you have to make them a good home and take care of them like little bambinos.